
lithgowlights
Dedicated elf
- Joined
- May 6, 2010
- Messages
- 1,023
OK After a week with the Anet A8 I have a few images and comments regarding this extremely affordable printer. Firstly a big thanks to Anet, Maker Hacks and especially Chris Garrett for this printer, and the help given to me by a few other users both in the Maker Hacks and in the Anet Facebook groups
The Anet A8, when I first saw it, was not on my radar at all. I own a Flashforge Dreamer and an Ararum Wombot, both which have been extremely reliable printers, so if I was looking at a new printer it was likely to be a metal frame and larger than a 250mm bed, so why the A8? I am forever printing things like covers, braces, clips, holders etc for other peoples display, so could the A8 be an affordable item that they could use to print their own items? In a word: Yes.
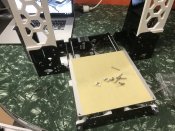
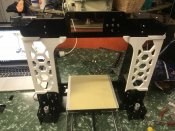
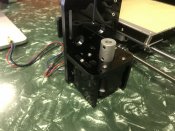
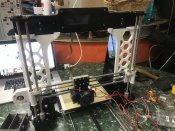
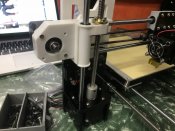
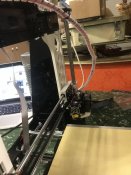
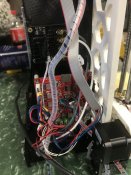
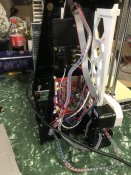
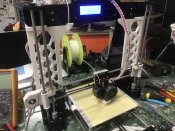
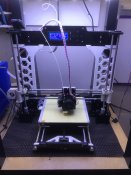
The A8's Laser Cut polycarbonate frame is far from stiff, but there are a massive number of different braces and clips designed to stiffen parts of the printer up, and in the end it is actually quite surprising how well the things work. I added some of the braces to the printer during the build, and will continue to add more soon, but the rest will be printed on the A8 itself I also added an external MOSFET for the heated bed, and will, very soon replace the heated bed wiring connections and maybe add a second MOSFET for the hot end.
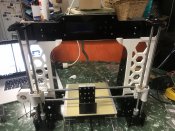
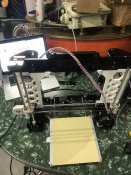
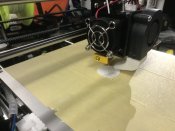
I have partly finished an enclosure for the printer, but at the moment it has no sides, as they will be added once the printer is completely tested, and upgraded. I still have a rear frame brace to add, as well as replacing the belts and adding belt tensioners. I will also add a glass bed to the printer as well, but that can wait as the tape is OK for now.
What needs to be done when you get the printer? Really nothing, but for reliability I suggest looking ad adding bracing, fix the cables on the hot end, and replacing the appallingly poor quality belts with something better. I also replaced the Power Supply with a 12V 350W one I had in stock here, as load testing the stock one caused it to fail after 3 hours at 180W - that was way shorter than I expected it to last.
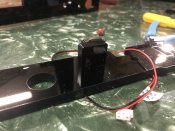
My only actual failure of the printer was something I should have checked. I had run a few prints with mediocre results in terms of layer bonding and strength. Using PLA filament that I knew was good, I could not get a decent print at 210c hot end, 60c bed - it was like it was under extruding, so a test was done to extrude 100mm and check the hot end did infact use 100mm of raw filament. It started so well, and then I noted an occasional skip of the extruder, and this got worse and worse. Hot end temps barely moved so it was not a poor heater, but in the end it turned out to be a clogged nozzle - small 2-3 mm runs caused no problem, but longer runs of 10+mm in one go simply caused the nozzle to clog, but wait 30 seconds and it would free again and you can print. It showed all the signs of the hot end cooling down, but a contact thermocouple showed less than a 3 degree drop. Swapped out the nozzle and it's printing perfectly!
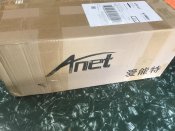
Well packed and undamaged - thats always a good thing from China

The adapter from the 2 pin plug to the Australian plug was not used, and I actually think this is illegal as the supplied PSU is NOT double insulated, and contains a metal frame so it should be earthed, and the provided adapter does not provide for an earth. The entire cable was thrown out and replaced with a new one.
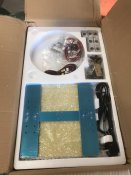
Box Layer 1
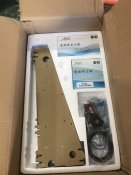
Box Layer 2. Oh and the paper cover of the laser cut acrylic frame is the devils work - it took ages to get off all the parts!
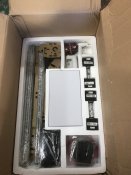
Box Layer 3.
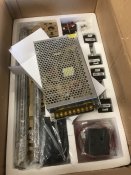
The supplied 12V 200W PSU. This PSU was replaced with a new 350W one, and failed my load testing after just a few hours.
Box
The Anet A8, when I first saw it, was not on my radar at all. I own a Flashforge Dreamer and an Ararum Wombot, both which have been extremely reliable printers, so if I was looking at a new printer it was likely to be a metal frame and larger than a 250mm bed, so why the A8? I am forever printing things like covers, braces, clips, holders etc for other peoples display, so could the A8 be an affordable item that they could use to print their own items? In a word: Yes.
The A8's Laser Cut polycarbonate frame is far from stiff, but there are a massive number of different braces and clips designed to stiffen parts of the printer up, and in the end it is actually quite surprising how well the things work. I added some of the braces to the printer during the build, and will continue to add more soon, but the rest will be printed on the A8 itself I also added an external MOSFET for the heated bed, and will, very soon replace the heated bed wiring connections and maybe add a second MOSFET for the hot end.
I have partly finished an enclosure for the printer, but at the moment it has no sides, as they will be added once the printer is completely tested, and upgraded. I still have a rear frame brace to add, as well as replacing the belts and adding belt tensioners. I will also add a glass bed to the printer as well, but that can wait as the tape is OK for now.
What needs to be done when you get the printer? Really nothing, but for reliability I suggest looking ad adding bracing, fix the cables on the hot end, and replacing the appallingly poor quality belts with something better. I also replaced the Power Supply with a 12V 350W one I had in stock here, as load testing the stock one caused it to fail after 3 hours at 180W - that was way shorter than I expected it to last.
My only actual failure of the printer was something I should have checked. I had run a few prints with mediocre results in terms of layer bonding and strength. Using PLA filament that I knew was good, I could not get a decent print at 210c hot end, 60c bed - it was like it was under extruding, so a test was done to extrude 100mm and check the hot end did infact use 100mm of raw filament. It started so well, and then I noted an occasional skip of the extruder, and this got worse and worse. Hot end temps barely moved so it was not a poor heater, but in the end it turned out to be a clogged nozzle - small 2-3 mm runs caused no problem, but longer runs of 10+mm in one go simply caused the nozzle to clog, but wait 30 seconds and it would free again and you can print. It showed all the signs of the hot end cooling down, but a contact thermocouple showed less than a 3 degree drop. Swapped out the nozzle and it's printing perfectly!
Well packed and undamaged - thats always a good thing from China
The adapter from the 2 pin plug to the Australian plug was not used, and I actually think this is illegal as the supplied PSU is NOT double insulated, and contains a metal frame so it should be earthed, and the provided adapter does not provide for an earth. The entire cable was thrown out and replaced with a new one.
Box Layer 1
Box Layer 2. Oh and the paper cover of the laser cut acrylic frame is the devils work - it took ages to get off all the parts!
Box Layer 3.
The supplied 12V 200W PSU. This PSU was replaced with a new 350W one, and failed my load testing after just a few hours.
Box
Attachments


Last edited:


")
