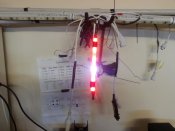
How To: Pixel Meteors (Pixicles, Pixemeteors)

DeeJai

Is that Magic Smoke?!?
Joined
Oct 18, 2011
Messages
1,008
Location
No longer in Radelaide
Well, Having seen Plasma's pixicles, I thought it was a good time to try make these myself. These are available for sale for about $10 each (large drop) plus postage from Ray Wu. I had a qty of 2812B strip left over from my mega tree, so i thought I would see if I could make it for cheaper.

Please be aware, the design for these is Plasmadrives, not mine, I have used his design as somewhat of a template. I have also used whatever else I had laying around.

So lets begin

Firstly I needed to figure out length of drops. I tried 20/16/10 pixels, and found that they were just too long, so through discussions, I decided to try slightly smaller ones. So the drops will be 14/10/6 pixels. The 3 drops will cover a distance of approximately 1m horizontally.

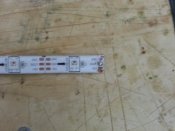
So cut my strip and exposed the copper pads. (Ensure you remove all silicone else you will find it difficult to add solder to these pads.
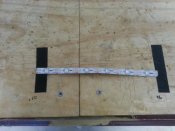
20140108_110639.jpg 20140108_111221.jpg

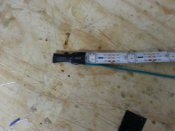
For the input end of the strip, I added solder to all three pads, for the output end, I only added solder to the Data pad. The reason for this, is I am going to run a single wire from the data back to the output plug, Power for this plug will be provided directly from the input plug, Like this.
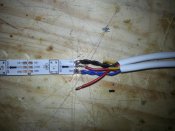
20140108_112007.jpg

The data wire from below will come up and join the non attached red wire.
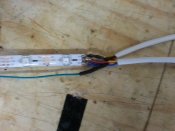
20140108_112228.jpg

From here it is a matter of adding some silicone and heatshrink.
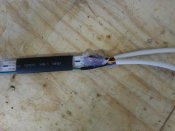
20140108_112319.jpg

More to follow
 

DeeJai

Is that Magic Smoke?!?
Joined
Oct 18, 2011
Messages
1,008
Location
No longer in Radelaide
after adding the heatshrink and silicone, I added a cable tie to the cables just to hold them together and to prevent them splaying and possibly allowing water to enter.

At the end of the meteor, I would add an endcap, but I havent ordered these yet, so I have covered it again with silicone and heatshrink.
20140108_112841.jpg

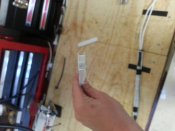
Then, to add some stiffness to the meteor, I added a two channel wide piece of coreflute.
20140108_113027.jpg

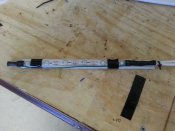
and simply taped it into position. (Please note, a. I ran out of white tape and b. My final version of these will be hot glued or siliconed to the backing material)
20140108_113055.jpg

All that remained now was to add the plugs to the ends and power it up.
20140108_115302.jpg

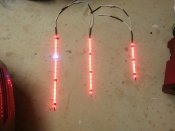
Here are last nights trials next to each other
20140107_185049.jpg

Easy to make, First one took me about 45 minutes, but I can make them now in about 10 - 15 minutes, just comes down to having stuff cut to size and ready to go.

Here are the test ones in action.


View: http://youtu.be/Gy4f60jOzPY
 

DeeJai

Is that Magic Smoke?!?
Joined
Oct 18, 2011
Messages
1,008
Location
No longer in Radelaide
here you go Dale and Coxie, hope that helps.

I will make a few more, today just so i can see 2 or 3 complete drops next to each other.. each segment will be 3 drops, consisting of a 6/10/14 pixel length
 

talk2coxie

Full time elf
Joined
Dec 29, 2010
Messages
142
Location
Heathcote NSW
Thanks Matt, it does seem easy enough to do.

I see each drop is able to be unplugged in case of repair which I really like.

With your drops of 14/10/6 would it be right to suggest power injection at every 5th or 6th drop?

Wherever power needs to be injected, is there a way to just unplug the connectors in between two drops and install some sort of power injection connections? How would you wire something like this up?

Now just gotta figure out where I can use such goodness??? I do have a large tree in the front yard which could use something like this......
 

DeeJai

Is that Magic Smoke?!?
Joined
Oct 18, 2011
Messages
1,008
Location
No longer in Radelaide
for power injection, i was thinking one of two ways... 1 would be every 3rd section end, and letting the power inject feed backwards aswell, or my preferred would be to inject after 2 complete sections.. so 60 pixels.

To do this, I would add a T connecter into it, and just have a power in ject cable run straight into that.
 

battle79

Full time elf
Joined
Dec 8, 2012
Messages
465
Location
Chirnside Park, Victoria, AU
My biggest concern with these is how to input them into sequencer and sequence them nicely.

For vixen I would have to input each drop as it's own sub-element. (not the end of the world)

Using for random drops equivalent to the snowfall tubes is easy enough.

But when I want to use to drop together all at once, I would need to make the effect a little longer for the 10, and longer again for the 14. This way all drop at same speed, some just continue further down.

This seems like a real pain to sequence and get timing right.

Cheers,
Rowan
 

DeeJai

Is that Magic Smoke?!?
Joined
Oct 18, 2011
Messages
1,008
Location
No longer in Radelaide
well what you are after is easily achievable in LSP. Add them all as a layer then run a colour slider macro over it, allowing the white (or whatever colours) to was from top to bottom.

As for the inputting of individual elements, yep, It would be a little tedious, but not too difficult. For me, I will have to create 51 different elements. And draw 51 different elements..

Or I could run the left and right side of the house in Paralel and only have to draw half the amount.

Sequencing will be interesting, I dont doubt that, but should be fun none the less.
 

Robert

Apprentice elf
Joined
Dec 5, 2012
Messages
92
Location
Wisconsin
I love the plasmacycles! I'm using the same method, building some props.

I like your idea, using coro to stiffen the strip. I'm using solid core thermostat wire, for my data return/stiffener.

I think I'm gonna have to build a set of these. Thanks for the write up:)
 

adski

Dave Brown
Joined
Feb 15, 2012
Messages
203
Location
Two Wells, SA
But when I want to use to drop together all at once, I would need to make the effect a little longer for the 10, and longer again for the 14. This way all drop at same speed, some just continue further down.

Synchronised dropping would be easily achieved in Vixen 3 by using the wipe (down) effect.

Dave
 

arw01

Full time elf
Joined
Dec 30, 2013
Messages
384
Location
Eastern Washington
Looking good Matt, could you try running some text across them like they were a matrix? I'm thinking I want to make my smallest at 8, 11,14 so that text could be run on the "top" of a horizontal matrix a high speed and your brain should put it together like a ticker.


So which one of Ray's strips did you pick up, and do you think it's necessary to use so many 3 wire connectors, vs making them hard three sections each with a connector on each end only?


Alan
 

DeeJai

Is that Magic Smoke?!?
Joined
Oct 18, 2011
Messages
1,008
Location
No longer in Radelaide
arw01 said:
Looking good Matt, could you try running some text across them like they were a matrix? I'm thinking I want to make my smallest at 8, 11,14 so that text could be run on the "top" of a horizontal matrix a high speed and your brain should put it together like a ticker.


So which one of Ray's strips did you pick up, and do you think it's necessary to use so many 3 wire connectors, vs making them hard three sections each with a connector on each end only?


Alan

Alan, I could probably give the text a whirl, but being that my shortest drop is 6. it may not show well as I heard 8 is a better number for height when it comes to pixels.

As for the connectors, yep, could be done in 3 piece segments. No isses with that at all, Only reason i did plugs after each, is because a. I had the plugs, and b. I prefer to be able to just rip a single section out and replace it.. but I will probably change to that segments of 3
 
Top