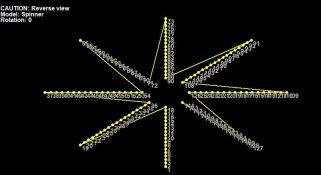
Custom DIY Spinner/Star

RolyT

Apprentice elf
Generous elf
Joined
Oct 8, 2021
Messages
65
After struggling to get my large arch to work I decided to join the air seeder tube together and make a large circle prop instead. As the diameter is about 2 metres I needed to brace with some pvc and thought I could use those legs for a spinner/star. The spinner will just be a simple design of 8 arms as per the picture below.
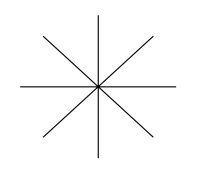
xlights star.JPG
In terms of wiring I was just going to run a single string of pixels over 4 runs (2arms each) with shortish extensions between 4 strings as per picture. This wiring is different to the native spinner wiring so just wanted to make sure wiring it this way will not cause any issues with effects etc?
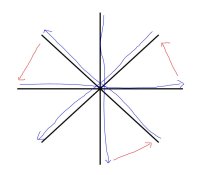
spinner wiring.JPG

I watched this video and he mentions that he wired his starting from the centre and went down each arm and then back again to ensure effects worked properly
View: https://www.youtube.com/watch?v=8dBbBbByA-s


I am hoping I can wire it as I propose without too many issues as long as the wiring map in Xlights is correct then effects will work as they should? Hopefully… 🤞
 
The wiring layout you have there will work great (xLights sees each spoke starting from the centre and out).
If you wanted to save some time on wiring you could try 'alternate nodes' method so the spoke's start/end pixel is at one side. It would need some extra finesse in the sub model to make it right.
 
You can wire it the way you want, and then add submodels. The first 8 to make would be the arms, 8 of them, starting from center. Applying effects to the submodels or groups containing the submodels will make it render the way other spinners would, regardless of how it is wired.

So, say it was 10 nodes per opposite arm pair, you would have submodels for:
6-10
16-20
26-30
36-40
5-1
15-11
25-21
35-31
Oh but not exactly in that order though. Because of the wiring optimization you did...
 
The wiring layout you have there will work great (xLights sees each spoke starting from the centre and out).
If you wanted to save some time on wiring you could try 'alternate nodes' method so the spoke's start/end pixel is at one side. It would need some extra finesse in the sub model to make it right.
So even if it is wired the other way it sees it starting in the centre? This is the wiring diagram from a native spinner I made to my dimensions and it has them starting on outside..

Spinner wiring2.JPG
 
That's controlled by the "Starting Location" about 7 rows down in the property grid.

You may also want to adjust 'Hollow %" as yours won't be hollow.

Anyway, to match your wiring order you'll have to convert it to a custom model. Right click and "Export as Custom xLights Model" Then add the custom model to your layout. Then mess with model data to get the order correct. (While there are ways to speed this up for large models, I think the manual approach is the simplest here and not going to take more than a few minutes.)
 
Back
Top