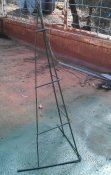
I caught the mini tree bug last year and looked around for something quick, easy and cheap to make up some tree with. Googling led me to J trees and also the tomato frame type trees. The J trees looked nicer for what I wanted and I decided that I had something that I could make my own version up with something I literally had lying around. I had a sheet of 6mm reinforcing mesh lying around that wasn't doing anything would save me a bit of the welding required. Below are photos and descriptions of how I made my "reo trees". The trees are 70cm high and taper up from 20cm wide per side with a taper in that gives a reasonably uniform shape from a wide viewing angle. Like the J trees they are stackable though once lights are wrapped they don't stack as tightly. The 20 cm spacing of the reo mesh prevents the sides from caving in when the lights are wrapped. The excess bits cut from the reo can be used to make the pegs to hold the trees in place.
The first photo shows the sheet of reo and where to cut and to "separate" the welds. If you don't want to save the excess bits for pegs then you can cut in each of these places. To separate the welds then you need to use a 4" or 5" grinder with 1 of the super narrow 1mm cut off wheels. You need to cut partially through the welds and then they can be wriggled and snapped.
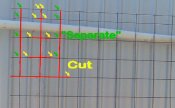
The second photo shows a cut and also a weld which needs to be "separated".
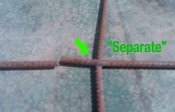
The third photo shows most of a reo tree cut out of the sheet. 3 welds remain to be separated on the right hand side.
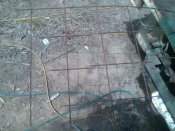
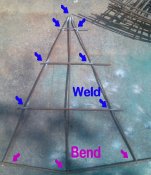
The 4th photo shows where the the 2 bottom pieces need to be bent up slightly and the 2 sides bent in slightly so that all three pieces meet at the top. 7 minor welds and the tree is virtually done. The excess bits extending out the sides can have a quick trim and then the tree can be prepped for painting.
The first photo shows the sheet of reo and where to cut and to "separate" the welds. If you don't want to save the excess bits for pegs then you can cut in each of these places. To separate the welds then you need to use a 4" or 5" grinder with 1 of the super narrow 1mm cut off wheels. You need to cut partially through the welds and then they can be wriggled and snapped.

The second photo shows a cut and also a weld which needs to be "separated".

The third photo shows most of a reo tree cut out of the sheet. 3 welds remain to be separated on the right hand side.

The 4th photo shows where the the 2 bottom pieces need to be bent up slightly and the 2 sides bent in slightly so that all three pieces meet at the top. 7 minor welds and the tree is virtually done. The excess bits extending out the sides can have a quick trim and then the tree can be prepped for painting.


