Background:
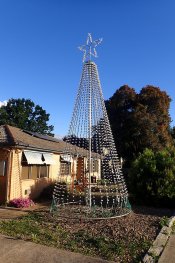
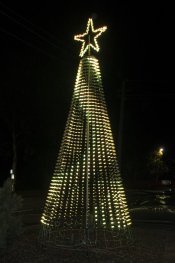
After five years away it wasn't hard to stay to something small to ease back into the game, over the years my megatrees have had anything from 40 vertical strands down to 24 depending on how the available strands got split up, yes that was plural trees
This year for something different I settled on 19 x 100 cnt strings doubled over for 38 x 50 cnt at 100mm (4") spacing as this is what i already had in storage. I use C9 3d printed covers over all the leds so they all needed to be reprinted, most of that is covered in a different thread.
Info:
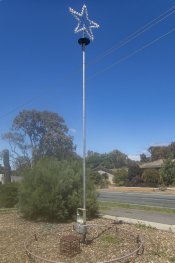
Pole is 60mm, 3mm wall Aluminium pipe at 6.5M long.
The hole in the ground is made up of 60mm Pressure pipe that has around 63mm internal diameter. It is sunk down to the rock/clay layer on the yard and concreted in place. The Aluminium pole goes about 900mm into the ground, not counting the extended pipe above ground.
The topper is made of Alu checker plate top and bottom with a 3D printer section sandwiched between for spacing. 19 holes are drilled around the outside for the string hooks.
The star on top has been around for a while and is made from 6mm Alu bent and weld as needed. It has 100 2818 dual data path pixels also with C9 covers. The dual path pixels are used in the event one goes faulty the rest keep working... last thing you want to do is fix a star in the middle of a season.
Local point of use conversion is used with 24v->5V convertors mounted under the topper, Coax is used to get the 2811 data signal up to the top.
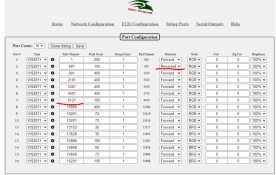
Everything is run from a very under utilised Falcon F16 v2
I can stand up and place the pole into the ground largely by my self still and then it just becomes add all the strips.
Lets add some photos
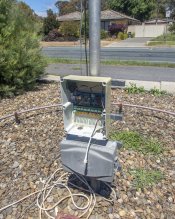
Pole in the ground with Controller and power supply cases in place
Close up of the front and back of the case setups
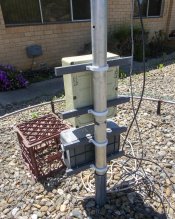
yeah i know more 3d printed bits, easy way to mount the cases to the pole.
Inside of the controller box after power up and network connection, the network cables have just been lying on the ground for 5 years, the cable is still good no cracks etc, the connector has lost it's click lock bit but otherwise plugged it in and it worked.
You will see a spare cable, I have always run a spare to each of the major items.
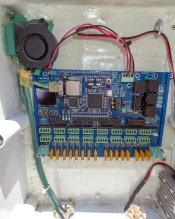
I would have re-done the ends but could not find the rj45 crimper.
Time for some verticals
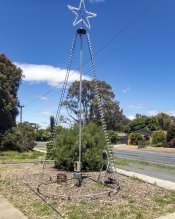
Two up on opposite sides so they could be tied off to balance the loading on the pole.
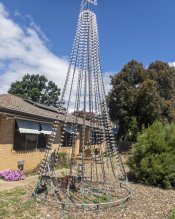
Still have 4x100 cnt to put up and then do the spacing and tie off each vertical.... then data and power getting closer
After five years away it wasn't hard to stay to something small to ease back into the game, over the years my megatrees have had anything from 40 vertical strands down to 24 depending on how the available strands got split up, yes that was plural trees
This year for something different I settled on 19 x 100 cnt strings doubled over for 38 x 50 cnt at 100mm (4") spacing as this is what i already had in storage. I use C9 3d printed covers over all the leds so they all needed to be reprinted, most of that is covered in a different thread.
Info:
Pole is 60mm, 3mm wall Aluminium pipe at 6.5M long.
The hole in the ground is made up of 60mm Pressure pipe that has around 63mm internal diameter. It is sunk down to the rock/clay layer on the yard and concreted in place. The Aluminium pole goes about 900mm into the ground, not counting the extended pipe above ground.
The topper is made of Alu checker plate top and bottom with a 3D printer section sandwiched between for spacing. 19 holes are drilled around the outside for the string hooks.
The star on top has been around for a while and is made from 6mm Alu bent and weld as needed. It has 100 2818 dual data path pixels also with C9 covers. The dual path pixels are used in the event one goes faulty the rest keep working... last thing you want to do is fix a star in the middle of a season.
Local point of use conversion is used with 24v->5V convertors mounted under the topper, Coax is used to get the 2811 data signal up to the top.
Everything is run from a very under utilised Falcon F16 v2
I can stand up and place the pole into the ground largely by my self still and then it just becomes add all the strips.
Lets add some photos
Pole in the ground with Controller and power supply cases in place

Close up of the front and back of the case setups


yeah i know more 3d printed bits, easy way to mount the cases to the pole.
Inside of the controller box after power up and network connection, the network cables have just been lying on the ground for 5 years, the cable is still good no cracks etc, the connector has lost it's click lock bit but otherwise plugged it in and it worked.
You will see a spare cable, I have always run a spare to each of the major items.

I would have re-done the ends but could not find the rj45 crimper.
Time for some verticals

Two up on opposite sides so they could be tied off to balance the loading on the pole.

Still have 4x100 cnt to put up and then do the spacing and tie off each vertical.... then data and power


