ACL Mk2 strobes

AAH

I love blinky lights :)
Community project designer
Joined
Dec 27, 2010
Messages
4,314
Location
Eaglehawk
This is the new spot for info regarding how to make, run, test the ACL Mk2 strobes and any questions about them.

The wiki page for these strobes is http://auschristmaslighting.com/wiki/ACL-Strobe-Mk2

The bulk buy thread that was run for these strobes is at https://auschristmaslighting.com/threads/acl-strobe-mk-2-bulk-buy-ends-12-september-2014.6196/ and this is where initial information and questions was located.

A post on modifying the Ray Wu 27 channel boards for 5V operation is at https://auschristmaslighting.com/threads/27-channel-dc-dmx-rgb-controller.741/page-13#post-20787 . The site doesn't always link to the correct post so check the numbers by "mousing" over the threads.
 

Attachments

  • Rough as guts assembly guide 1.2.pdf
    5.3 MB · Views: 105
AAH Wrote...@ nzlongfellow . I'm still trying to puzzle out how you are connecting things. In the photos you have the buck converter hooked up to the output of the dimmer. This won't work and is probably likely to destroy either the 27ch boards mosfets and/or the buck converter. The type of load that the buck converter presents to the dimmer isn't what it is designed for. The buck converters power needs to be hooked up to the 27ch boards 12V or 24V supply and the 5V output supplies the positive power for the strobes. If the buck converter has an isolated output then the output 0V line needs to be connected to the 0V of the 27ch board which is also the 0V supply for the buck converter. Can you post a photo of the front (and back if there are any details on it) of the buck converter and/or a link to it so I can see exactly what each wire does. AAH END


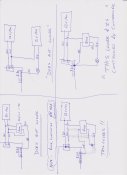
[font=tahoma, sans-serif]Photos and plus wiring diagrams that work and don't.


[/font]
 

Attachments

  • 20141024_170624[1].jpg
    20141024_170624[1].jpg
    1.2 MB · Views: 70
  • 20141024_170610[1].jpg
    20141024_170610[1].jpg
    1.1 MB · Views: 53
  • 20141024_192225[1].jpg
    20141024_192225[1].jpg
    1.2 MB · Views: 53
  • ACL Strobe wiring 001.jpg
    ACL Strobe wiring 001.jpg
    537.2 KB · Views: 64
I think I may know why the correct method of operating the strobes isn't working but the incorrect is. What I think is happening is that the test mode you are operating in xlights is turning on the output for a short period of time of quite possibly less than a second. When this is hitting the strobe circuitry you are probably only getting a flash or part of a flash before the output is turned off. When the buck converter is hooked up to the output the input and output capacitors are charging and instead of a "on" duration of 1s the capacitors are allowing a few seconds of "on" time for the strobes before the capacitors discharge.
I've never used the test mode of xlights but I'd give da_e131 a go and try turning on the outputs for at least a few seconds at a time. The chase tab makes it easy to do this and you can preset the dmx level to 255 to supply to 100% to 0% transition that the strobes need.
 
AAH said:
I think I may know why the correct method of operating the strobes isn't working but the incorrect is. What I think is happening is that the test mode you are operating in xlights is turning on the output for a short period of time of quite possibly less than a second. When this is hitting the strobe circuitry you are probably only getting a flash or part of a flash before the output is turned off. When the buck converter is hooked up to the output the input and output capacitors are charging and instead of a "on" duration of 1s the capacitors are allowing a few seconds of "on" time for the strobes before the capacitors discharge.
I've never used the test mode of xlights but I'd give da_e131 a go and try turning on the outputs for at least a few seconds at a time. The chase tab makes it easy to do this and you can preset the dmx level to 255 to supply to 100% to 0% transition that the strobes need.


Thanks for following this thread Alan.
Thinking back last night the two options I have shown working are both working thru the Buck. Da :D


During my testing I have an RGB set up on the Pixlite 4 to confirm there is an output.
I have left the strobes flashing for 30 minutes through the Buck, then stopped and started them through xLights so I have control.
Good point , though, about the capacitor discharging as that is why they take several seconds to decay.

Will try and work out how to use da_e131.
 
OK. Ran da_e131.
1 x strobe wired with 5V supply and one off the Buck.
Still only get the one with Buck to operate.
Time to carry on with building the rest and see what develops.
 
Well now we know where all the Christmas fairies Superman's been talking about have gone too.
 
Woohoo. That looks nice and random :)
The strobes should work down to about 3.6V with no change to the function at all so you're just on the edge of seeing a noticeable drop in brightness at the far end.

nzlongfellow said:
100 ACL strobes up and running.
90metres 2mm speaker cable. 1.5V drop one end to the other. But will be feeding both ends.


http://vimeo.com/109996159
 
dougd said:
Looks great Dennis. Cant wait to see the display this year.
Thanks dougd. I don't hold out to much hope for a display this year. I relocated to another branch, 3 hours drive away, 2 months ago. Now I have to go back there from now till 1st week in Dec starting at 2 days a week building to full time 7 days. :'( :'(
 
Just a heads-up on my build defects.


Biggest failure rate was not "tinning" the legs on the strobe properly and getting dry joints. Basic I know and I thought I was Sooooo careful.
Second was reversed voltage. The speaker cable has a blue stripe and clear. The strobe wires are Red and Blue. When old age kicked in I fitted a few the wrong way and didn't notice at test time.
Also found that if I inserted the assembly so that the strobe head was in the middle of the cover I got a better display rather than pushing it too close to the end.


Hope this helps someone.
 
What are you guys filling the node covers with to protect the board? Silicon from the BORG or ??


and what wire are most you using, not sure I have a lot of 2 conductor, have a fair amount of 4 conductor from Ray, but when that starts getting long might have some voltage drop issues!
 
arw01 said:
What are you guys filling the node covers with to protect the board? Silicon from the BORG or ??


and what wire are most you using, not sure I have a lot of 2 conductor, have a fair amount of 4 conductor from Ray, but when that starts getting long might have some voltage drop issues!


Mine are not filled. I glued the sleeve into the cover then fitted shrink wrap over to seal. Some pic earlier in this thread...
I had some spare 3-wire plugs from Ray that are pre-tinned on the ends. Used them.
Voltage drop is not a bug issue I have 100 on 90 metres of 2mm cable and only get 1.5V drop. The current draw is very low.
 
A new more comprehensive assembly guide (Rough as guts assembly guide 1.2.pdf) has now been posted at the top of this thread and will be posted on the wiki page shortly.
 
Back
Top