Candy Cane effect issue

OzAz

Senior elf
Global moderator
Joined
Dec 29, 2015
Messages
997
Location
Newcastle
I'm sure there's some simple reason, just can't put my finger on it

testing a boscoyo type candy cane custom model in xLights, trying to do effects but they're not working as I thought/expected/hoped they would.
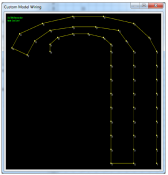
lights change colour up the cane "line by line", but when they get to the curved part both sides change.
would have expected the way the lights are configured they should still change "line by line" around the curve, ie 3 pixels at a time

attached video shows a bars effect and how lights are wired and laid out. all effects do the same - light both sides of curve.

how do I get it to stop lighting up both sides of the curve and actually go around the curve?

https://vimeo.com/209892893

If I use the actual candy cane model the effect works as expected, however then I can't get the 3 pixels wide, which the actual prop is (or will be if I get them).

https://vimeo.com/209894789


signed
still a noob
 
Its all about which render buffer type you use. Did you try changing the render style to "Single Line"?
 
I had already tried Single Line, but didn't have any luck.


Following your suggestion Gil, tried it again but with Transformation set to Rotate CW 90 and a few other changes and sort of get the effect I was after. Though this is more of a rotate than straight up.


I'll keep trying options unless anyone has any other suggestions or wants to provide exact effects settings to get this to work the way I'm trying to do it (as per second video with 4 candy canes).


cheers
 
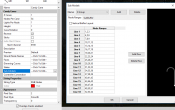
You could try creating a submodel that includes all the nodes but in a more useful grid. I'm not sure if it would be:


row1: 1-3
row2: 4-6
row3: 7-9
etc...


or:


row1: 1,4,7,10,etc....
row2: 2,5,8,11,etc...
row3: 3,6,9,12,etc...


experiment with both and see what works best.
 
OzAz
How did you go with your candy canes? During the week I made a test cane, with 54 nodes (3 on each line, 18 rows), but it drove me crazy that the effect followed one node after the other, and not line by line. Using Dan's settings of the sub model I was able to group each line and the effects now go line by line up, and follow around to the end of the cane. I'm now going to start on another 9 canes.
Let me know if you are sill having problems and I'll post some pics of my settings.

https://www.dropbox.com/s/q2dndhcpu33u4y6/MOV_1326.mp4?dl=0

Thanks
Shane

That looks good Shane. Still waiting delivery from boscoyo but wouldn't mind details of the sub models.
 
G'day
I wired mine line by line, similar to Ozaz's and then created the sub model as Dan suggested.

They below saves creating custom models.

upload_2017-5-7_10-44-29.png

On the sequencer tab, expand the Candy cane Element and it will show the sub model group. Put your effects on that to show the output in my video.

upload_2017-5-7_10-46-5.png

You can then use either row depending on the effect you want.

Shane
 
@OzAz Hi Oz what's the solution any chance you could export the model and send it to me please?
 
Ha ha, I'd forgotten about that, was racking my brain the other day how to do the effect.
Will send my model @drakky
 
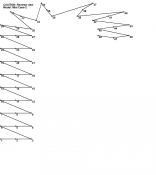
ok so here is the wiring? pain that it can't work the way the boscoyo model is and have in and out at the bottom
Mini Cane.png
 
A quick little lead running down the back to an "out" pigtail at the bottom isn't too hard to arrange. It's behind the prop so doesn't need to be too pretty!
 
Back
Top