One of the elements i added this year that was a hit with my display was my colour coro candles, these worked far better than I expected and I was happy with the results. Ive had many requests on doing a how to for these so here it is
First the Video
Fasteddys Coro Candles
The parts used per candle
1: 1 x 1220 x 2440 sheet of 5mm corex ( it doesn't matter what size sheet is used as long as it meets the size you need.)
2: 30 x RGB Rectangular Pixels modules (you can also use pixel strip instead)
3: 2 x 4 pin Male and Female plugs
4: Hot Glue and Silicone
5: 4 core 14/020 security cable
6: 5 x Plastic wall screws
[attachimg=1]
Basic Instructions
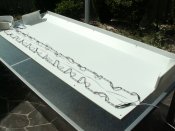
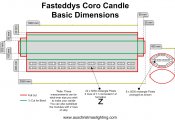
1: Measure and mark out your corex sheet to the dimensions you require using the template shown
[attachimg=2]
2: Cut out the shape of the candle and flame from the corex as shown above. The red is the cut marks, the green lines are for 1/2 cut marks to create the bends
3: Create the bends/corners by only cutting the outer bend/corner and leaving the inner bend/corner intact (this is much easier if you use a coro cutter that allows for bend cuts)
4: Create the flame sides by cutting a straight piece of corex to suit and then cutting the outer corex sheet so you can create the smooth bend in the flame wall.
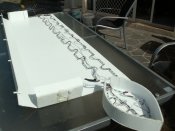
5: Hot glue in place the bottom part of the flame with the walls leaving the top off so the modules can be added
6: Create a string of 8 modules with a male plug and mount to the bottom of the coro flame with silicone/hot glue.
7: Hot glue the top to the coro flame to complete the flame.
8: Create 2 strings of 11 modules (or use strip) with a male plug for the input of the first string/strip and a female plug for the end of the second string/strip. Connect the two strings with 4 core security cable so that the 2 rows of modules/strip are connected in a Z formation
9: Mount the 2 rows of 11 modules or strip as shown in the below picture with hot glue or silicone.
[attachimg=3]
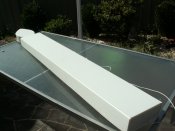
10: Bend the corex to create the 'candle stick' box
11: Use 5 x plastic wall screws to hold the box together.
12: Connect the flame cable to the output cable of the 'candle stick' box
13: Silicone/hot glue the flame in place
14: Connect up to any controller that supports the pixel IC type used
15: I used the twinkle effect in Lightshow pro for my flame effect
[attachimg=4]
So that is the basic construction of the colour coro candles which were are a great addition to my display in 2011


