
ShellNZ
Senior elf
Just thought I'd do a how-to on how I made my pixicles.
They are pretty much the same as plasmaicicles or Matts how-to with a few slight differences.
I used WS2812b strip - http://www.aliexpress.com/store/product/BLACK-PCB-5m-DC5V-WS2812B-led-pixel-srip-IP68-30pcs-WS2812B-M-with-30pixels-reverse-protection/701799_926778326.html
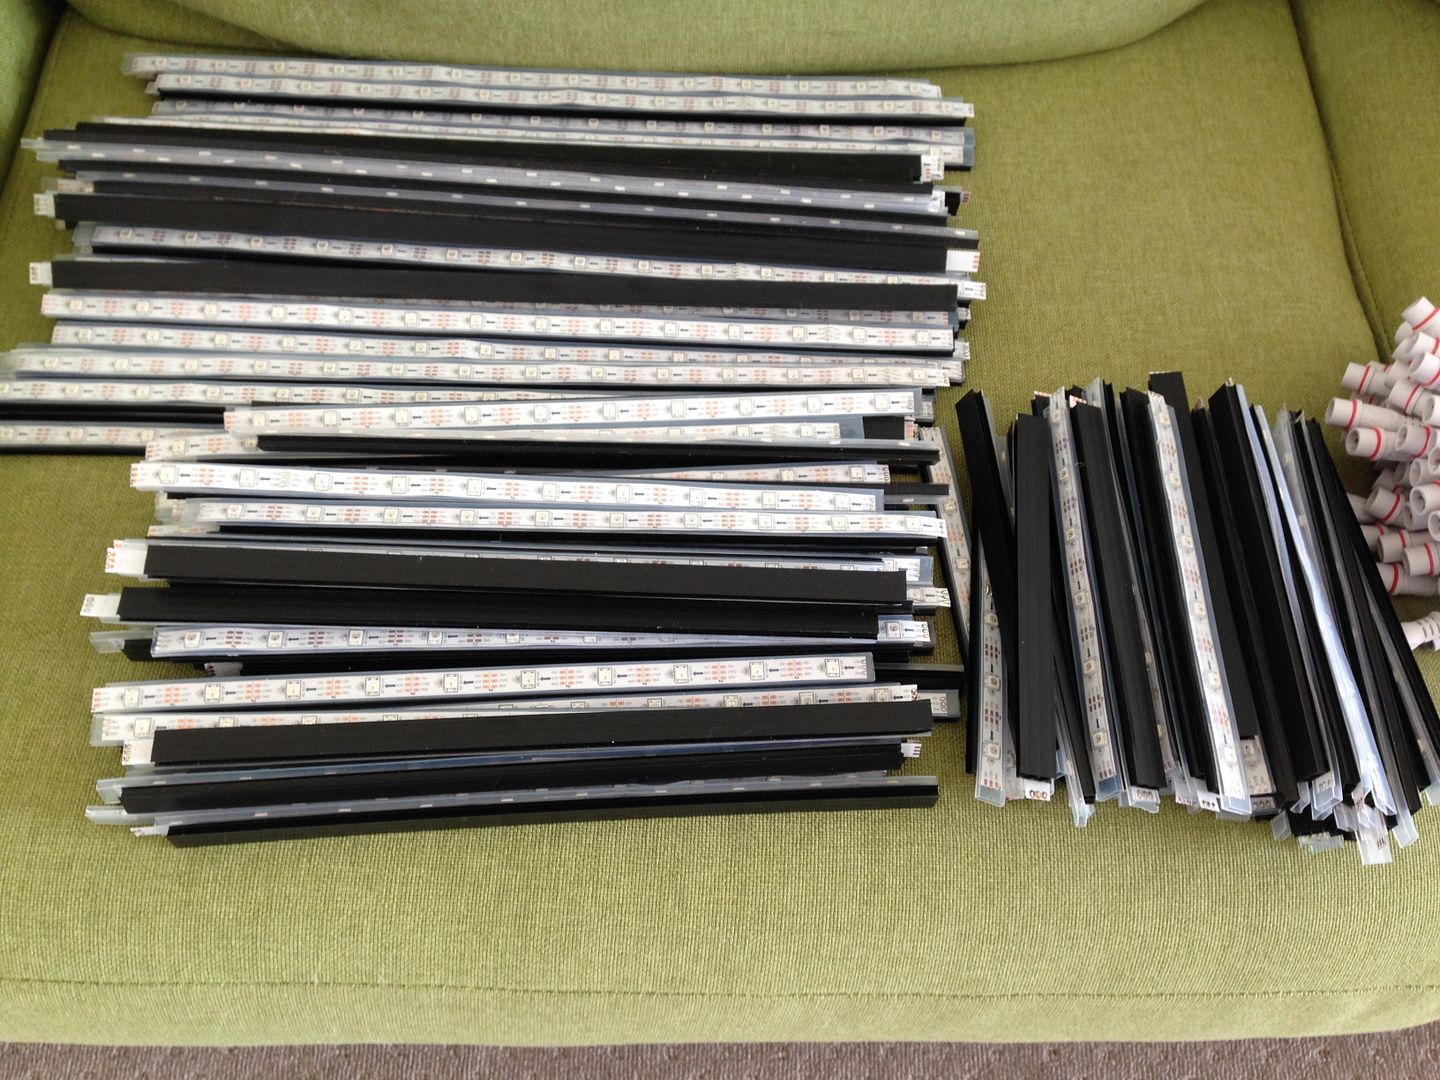
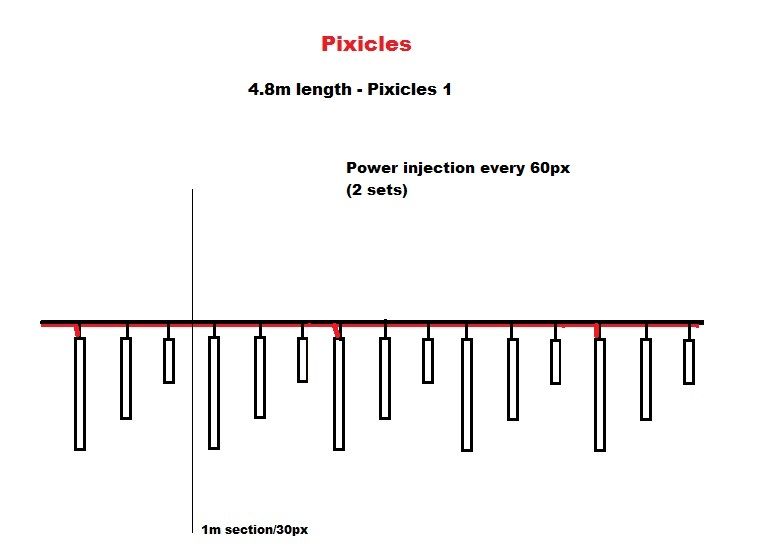
I made them in production line style which I enjoyed. The upper icicles I have 22 sets (660px) and the lower floor I have 25 sets (750px). I am using 2 x P2's to run them and have had to use multiple power supplies to inject power.
1. Cut strips into lengths required. I made them the same length as plasma did, 14px, 10px & 6px.

2. I then attached them with silicone to lengths of corflute as I wanted to keep the strip flat as over time I could see them curling up. The corflute I cut along the channel length, 2 channels wide.
 3. I then soldered both ends of all the strips, top front of strip and back bottom of strip. Remember to keep an eye on arrow direction. All my arrows of my strips of course pointed down.
4. I then cut all the 4-core lengths of cable I would need. Mine differ from others in that I have only put connectors at the end of each 14/10/6 set, so only needed 47 x 4-core connectors, not 141. I just used 4-core security cable to join the sets together. Not only was this due to the cost of all those connectors but also, the less "soldered joins" the better and I had heaps of sec cable. I bought the 50cm white connectors.
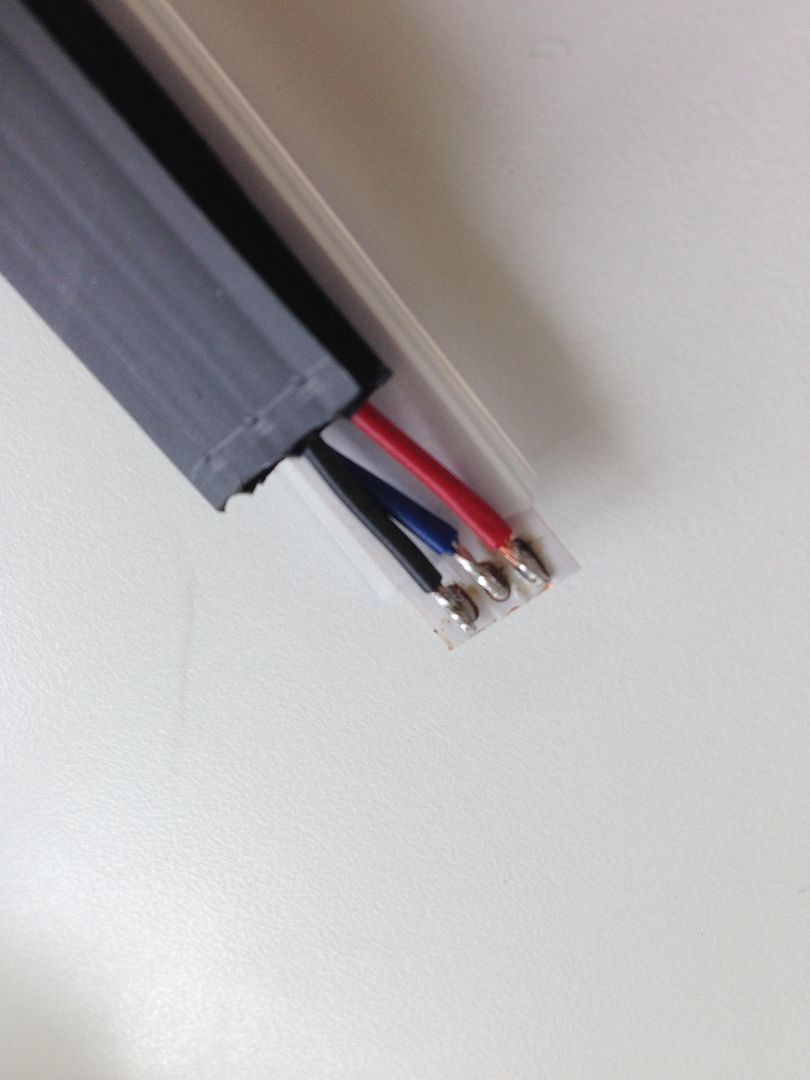
Another difference between mine and others is, I threaded all 3 wires down through the channels of the corflute to attach to the back bottom of the strip. Plasma twisted his + and GND wires with the the top of the strip wires, Im not very good at that so put all 3 wires down.
Therefore the lengths of cable required to go from 14px to 10px and 10px to 6px had to be long enough to go down the back of the corflute then to next strip. Hopefully that makes sense lol.
So my lengths were:
14px to 10px - 1metre
10px to 6px - 80cm
6px to next set is where I used the 50cm connector.
5. I stripped the white sheath off the same length (with and inch more) as the corflute/strip. One thing I learned my lesson on is....straighten out the wires (I cut one core out of course) before you insert them down the corflute channel as if they are twisted you will find your strip dont sit flat/straight. I only started doing that about quarter of the way through the project darn it.

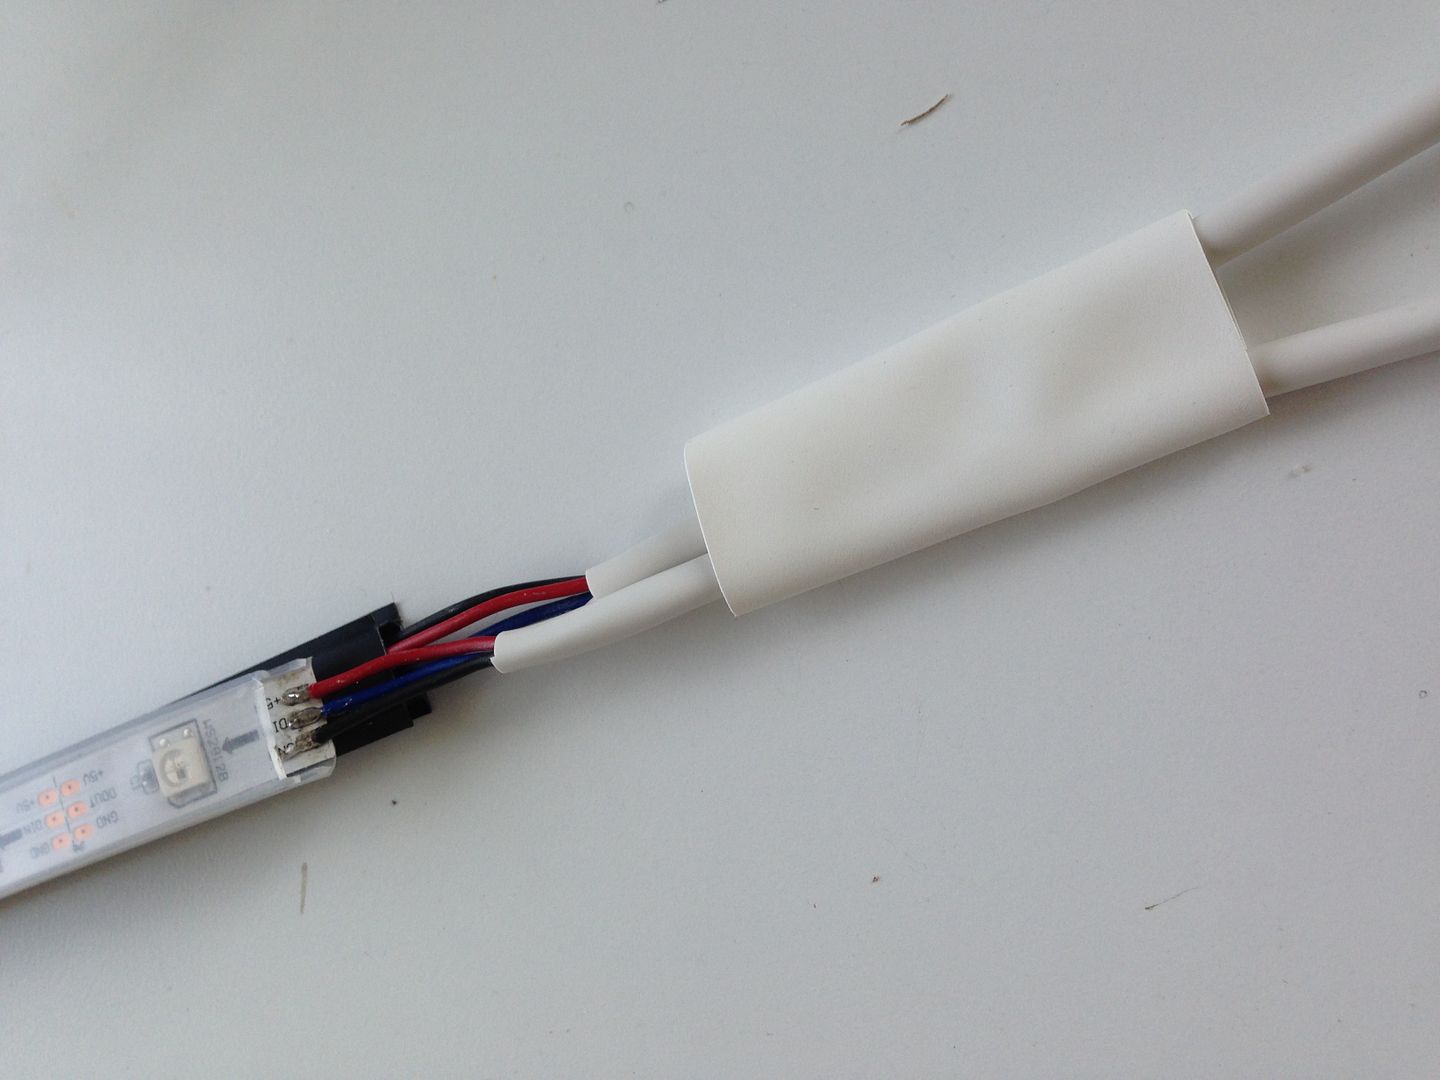
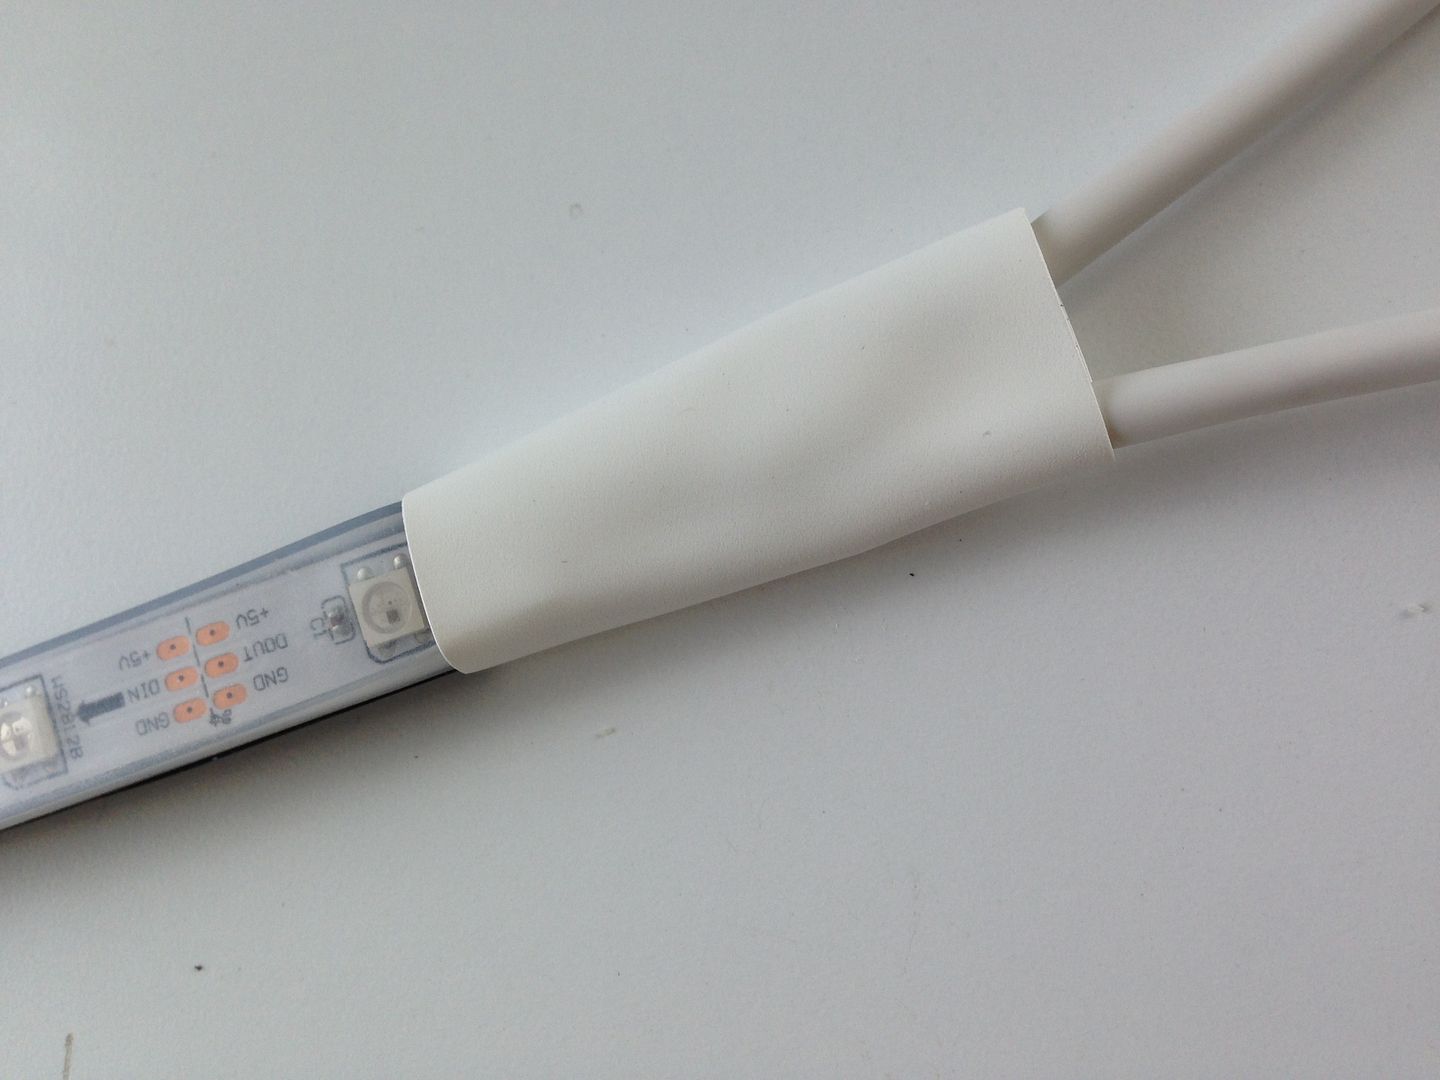
6. Next I started soldered the cable to the strips. REMEMBER to add the lengths of heatshrink BEFORE soldering cable to strip when needed.
 I did the above to all the pixel strips, I did NOT silicon and heatshrink up yet as I wanted to make sure they were all working and soldered correctly before sealing it all up, nothing worse than cutting heatshrink away and picking away the silicon later on.
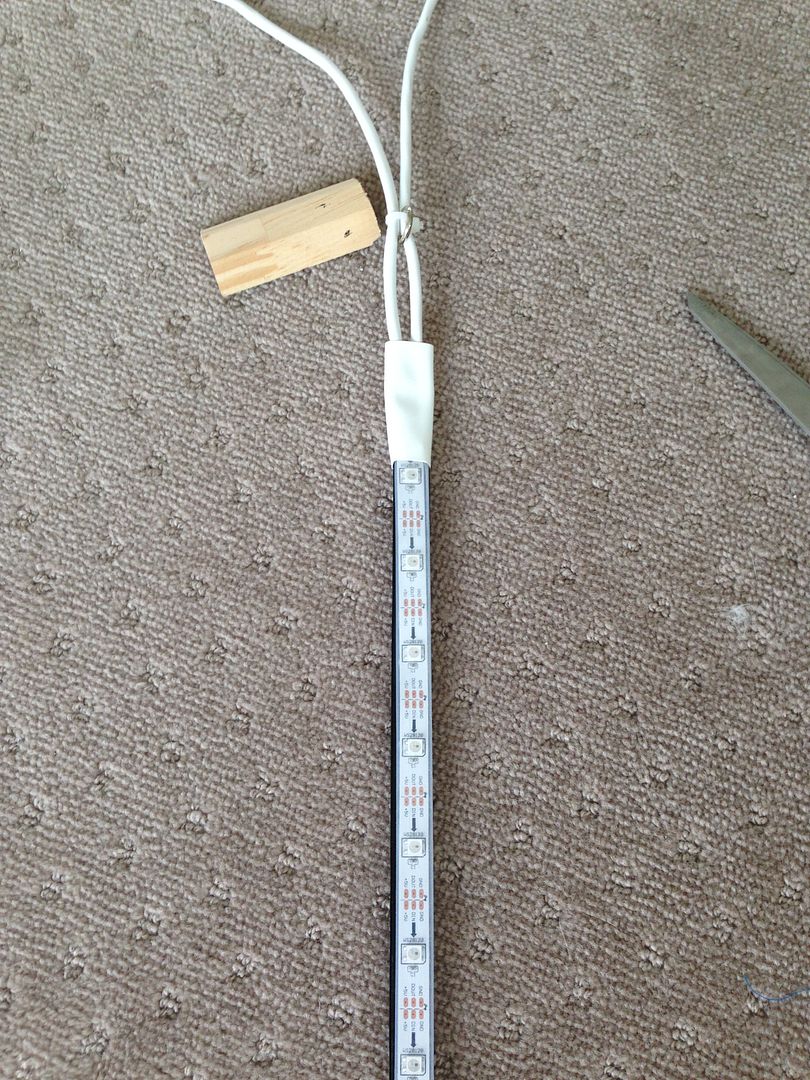
This is the bottom back of the strips where the wires come out of the corflute channels and get soldered onto back of strip.
Another thing I did as well was solder the power injection (SPT) wire onto every 2nd long length of strip. So there is essentially injection every 60px. I had to measure the SPT wire out for the distance it would be to the nearest power supply.
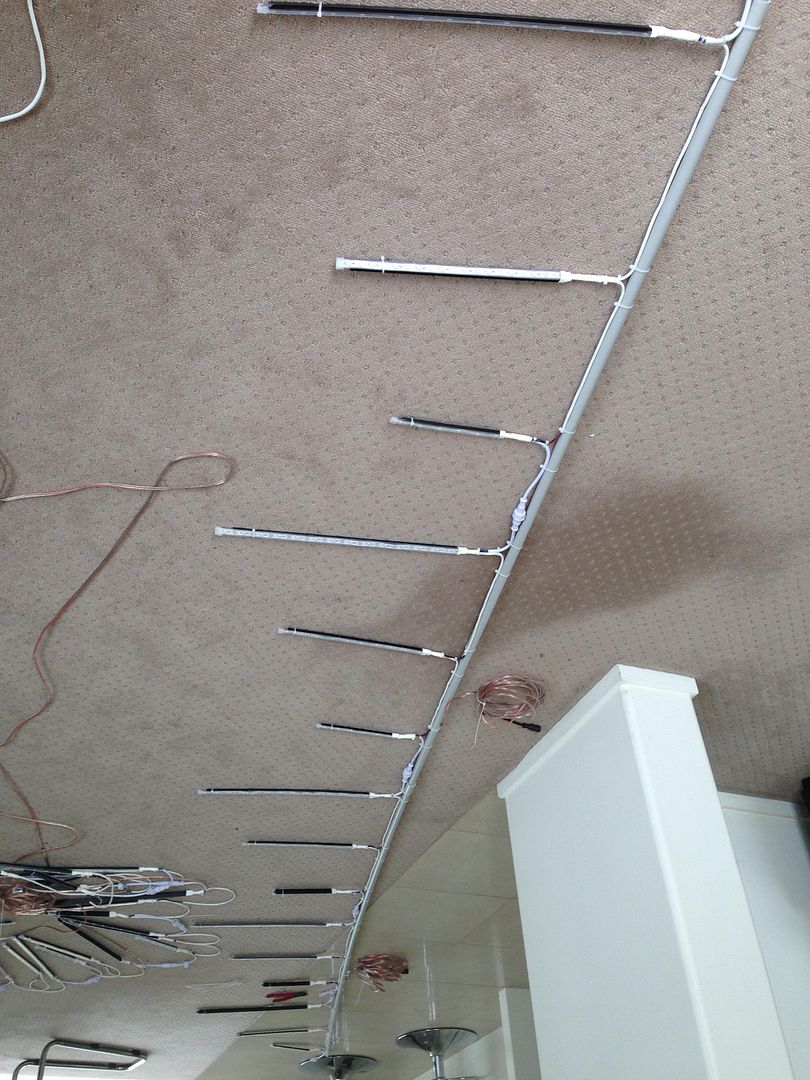
This for example is what my first length looks like on my upper floor.
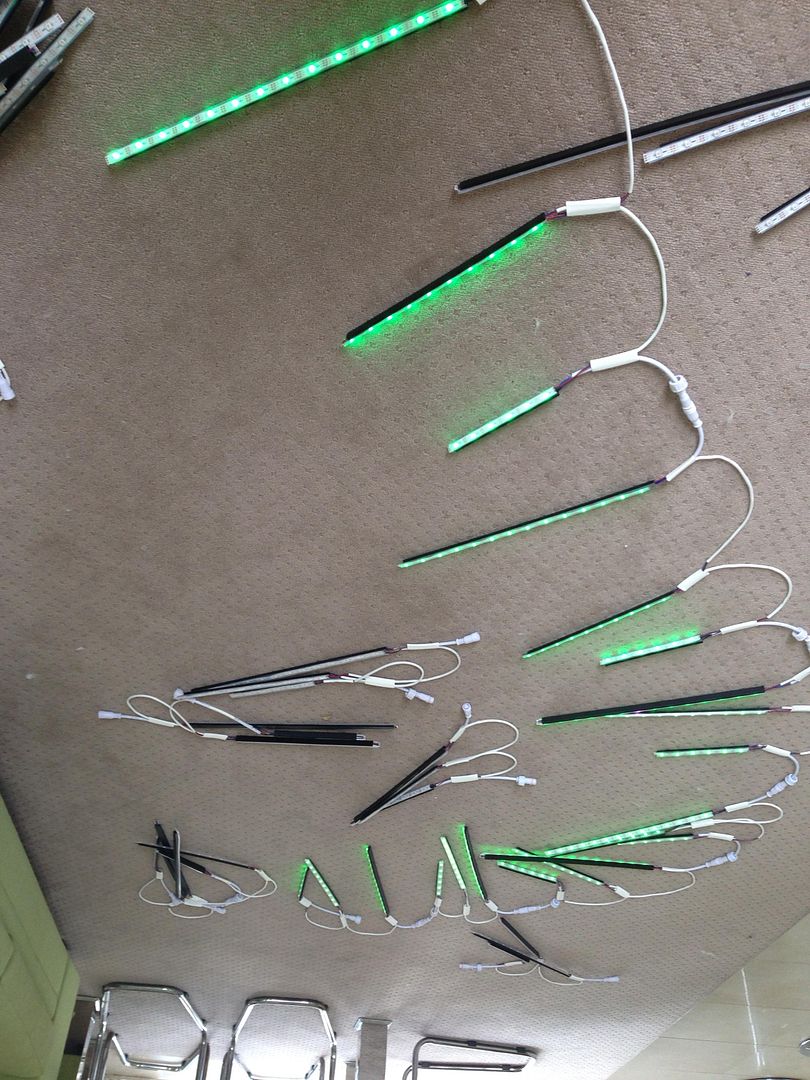
I then started testing the sets with them laid out on the floor. I wanted to make sure I had all 22 sets and 25 sets working before siliconing/heatshrinking them all up.
10second video of the upper floor lot working - http://vid126.photobucket.com/albums/p112/Toby3_photo/Xmas%20lighting/Pixicles/IMG_2164_zpsd2710e25.mp4
I then siliconed them all up and heatshrinked.
I was originally going to put them on angle wood and fix to the eves of my house (the wood was also going to have flood strip attached to it. I then realised that the weight of the pixicles would be too much for the wood so decided to attach them to grey 20mm conduit.
I cut the conduit into 2m lengths purely for storage purposes as having lengths of e.g 8.4m I had nowhere to store them. So I have them cut into 2m lengths so 2 sets are attached. I will also be putting conduit clips up on the eves so when it comes time it will just be a matter of joining together (with joiners) the correct lengths of conduit then clipping them into clips.
The pixicles are attached with a crapload of transparent zipties (each side of pixel strips)
I also put zipties up near or on the heatshrink part and at the bottom as shown, just incase the strip came away from the corflute.
Thats about it. It took approx 3wks to make them bearing in mind I work from home when a job comes in, have 2 kids etc etc. All up if I worked 8hrs a day on them I would say 60-80hrs.
They are pretty much the same as plasmaicicles or Matts how-to with a few slight differences.
I used WS2812b strip - http://www.aliexpress.com/store/product/BLACK-PCB-5m-DC5V-WS2812B-led-pixel-srip-IP68-30pcs-WS2812B-M-with-30pixels-reverse-protection/701799_926778326.html
I made them in production line style which I enjoyed. The upper icicles I have 22 sets (660px) and the lower floor I have 25 sets (750px). I am using 2 x P2's to run them and have had to use multiple power supplies to inject power.
1. Cut strips into lengths required. I made them the same length as plasma did, 14px, 10px & 6px.
2. I then attached them with silicone to lengths of corflute as I wanted to keep the strip flat as over time I could see them curling up. The corflute I cut along the channel length, 2 channels wide.
4. I then cut all the 4-core lengths of cable I would need. Mine differ from others in that I have only put connectors at the end of each 14/10/6 set, so only needed 47 x 4-core connectors, not 141. I just used 4-core security cable to join the sets together. Not only was this due to the cost of all those connectors but also, the less "soldered joins" the better and I had heaps of sec cable. I bought the 50cm white connectors.
Another difference between mine and others is, I threaded all 3 wires down through the channels of the corflute to attach to the back bottom of the strip. Plasma twisted his + and GND wires with the the top of the strip wires, Im not very good at that so put all 3 wires down.
Therefore the lengths of cable required to go from 14px to 10px and 10px to 6px had to be long enough to go down the back of the corflute then to next strip. Hopefully that makes sense lol.
So my lengths were:
14px to 10px - 1metre
10px to 6px - 80cm
6px to next set is where I used the 50cm connector.
5. I stripped the white sheath off the same length (with and inch more) as the corflute/strip. One thing I learned my lesson on is....straighten out the wires (I cut one core out of course) before you insert them down the corflute channel as if they are twisted you will find your strip dont sit flat/straight. I only started doing that about quarter of the way through the project darn it.
6. Next I started soldered the cable to the strips. REMEMBER to add the lengths of heatshrink BEFORE soldering cable to strip when needed.
This is the bottom back of the strips where the wires come out of the corflute channels and get soldered onto back of strip.
Another thing I did as well was solder the power injection (SPT) wire onto every 2nd long length of strip. So there is essentially injection every 60px. I had to measure the SPT wire out for the distance it would be to the nearest power supply.
This for example is what my first length looks like on my upper floor.
I then started testing the sets with them laid out on the floor. I wanted to make sure I had all 22 sets and 25 sets working before siliconing/heatshrinking them all up.
10second video of the upper floor lot working - http://vid126.photobucket.com/albums/p112/Toby3_photo/Xmas%20lighting/Pixicles/IMG_2164_zpsd2710e25.mp4
I then siliconed them all up and heatshrinked.
I was originally going to put them on angle wood and fix to the eves of my house (the wood was also going to have flood strip attached to it. I then realised that the weight of the pixicles would be too much for the wood so decided to attach them to grey 20mm conduit.
I cut the conduit into 2m lengths purely for storage purposes as having lengths of e.g 8.4m I had nowhere to store them. So I have them cut into 2m lengths so 2 sets are attached. I will also be putting conduit clips up on the eves so when it comes time it will just be a matter of joining together (with joiners) the correct lengths of conduit then clipping them into clips.
The pixicles are attached with a crapload of transparent zipties (each side of pixel strips)
I also put zipties up near or on the heatshrink part and at the bottom as shown, just incase the strip came away from the corflute.
Thats about it. It took approx 3wks to make them bearing in mind I work from home when a job comes in, have 2 kids etc etc. All up if I worked 8hrs a day on them I would say 60-80hrs.
