Navigation
Install the app
How to install the app on iOS
Follow along with the video below to see how to install our site as a web app on your home screen.
Note: This feature may not be available in some browsers.
More options
You are using an out of date browser. It may not display this or other websites correctly.
You should upgrade or use an alternative browser.
You should upgrade or use an alternative browser.
Show us you controller enclosures
- Thread starter lmpearce
- Start date
If you are looking for ideas these are the control boxes which I made, these are very much inspired by the boxes which @LawrenceDriveLights made a video about a few years ago. 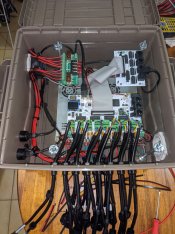
These are made using the MTR ammo boxes, I can not recommend these enough, yes they cost a bit of money and they have gone up in price since I made my boxes but these boxes have been outside from end of October to the start of January in Darwin which has huge heat and a lot of rain and I have not had a fault at all.
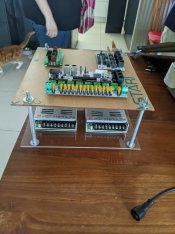
The main design of these are a standalone from the box so if I need to work on it I can pull them outside the box to do any wiring. I used clear acrylic and mounted the controllers to the top and power supplies to the bottom.
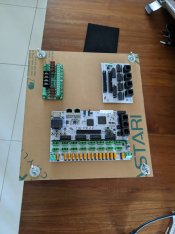
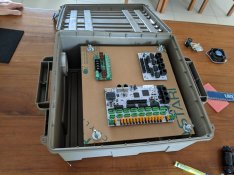
lots of testing to make sure that I was happy with the layout and making sure I could run the wires where they needed to go inside the box.
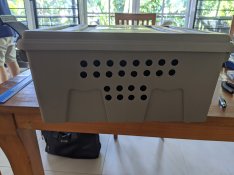
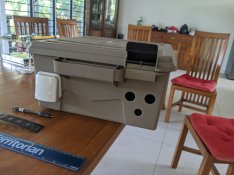
Nothing like taking your water proof box and drilling a bunch of holes in it. The holes on the front of the box are all for the controller out puts, the 16 holes are for each port on the controller and the 8 on the bottom are for power injection.
The holes on the side. the 2 on the top are for Ethernet ports and the bottom one is for power in.

These are made using the MTR ammo boxes, I can not recommend these enough, yes they cost a bit of money and they have gone up in price since I made my boxes but these boxes have been outside from end of October to the start of January in Darwin which has huge heat and a lot of rain and I have not had a fault at all.

The main design of these are a standalone from the box so if I need to work on it I can pull them outside the box to do any wiring. I used clear acrylic and mounted the controllers to the top and power supplies to the bottom.


lots of testing to make sure that I was happy with the layout and making sure I could run the wires where they needed to go inside the box.


Nothing like taking your water proof box and drilling a bunch of holes in it. The holes on the front of the box are all for the controller out puts, the 16 holes are for each port on the controller and the 8 on the bottom are for power injection.
The holes on the side. the 2 on the top are for Ethernet ports and the bottom one is for power in.
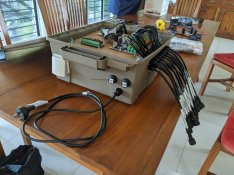
More testing with all the cables, I used cable glands on each cable instead of having multiple cables in 1 larger gland.
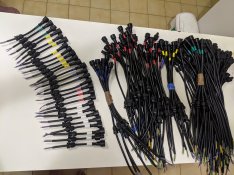 I colour coded my boxes, it was a lot of work to do but I was really happy with how the all looked in the end, its easy when installing where we can just work on the White box for example, everyone knows which box we are talking about.
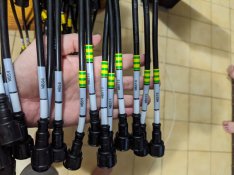
Use a label maker label every cable, I came up with a system where each port was unquietly identified so all my ports. This is a small thing but so important to do.
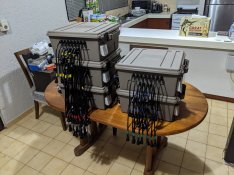
I made a few in boxes my 1st year so it was good to have a uniform look it was easy to build when you aren't trying to reinvent the wheel each time you make a box. I have made 3 more boxes like this and have 1 more to make this year.
I should also say not all boxes have F16s in it, most had smart receivers in them.


