As someone who drilled all my rooflines and window frames, but then used chromatrim for my gutter lines, I wholeheartedly agree with @thewanderingpine 's comment above about time constraints.
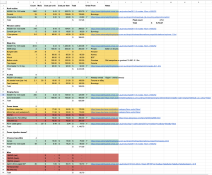
Note that I started drilling in April, whenever I had some spare time. It took a fair bit. That was around 480 nodes for windows, and 200 for the roof line
Note that I started drilling in April, whenever I had some spare time. It took a fair bit. That was around 480 nodes for windows, and 200 for the roof line
 . This looks like a very good call.
")

 ) I'll give them a paint!
 ) I'm going to move from my arduino PoC to an actual ESP32/WLED setup and start fiddling around with the programming, power injection points, 5v -> 3.3v stepping, and all the other fun stuff. Funny story, I ended up browsing the local Reject Shop while I was in a phone meeting and found a couple of cheap solar lanterns for $3 each so I grabbed them, brought them home and ripped them apart to see how they work (1.2v circuit with a cute 200mAH battery), thinking maybe I could chuck in a couple of 18650 batteries, step down and run a couple of WS2811s in the lantern and make them orange.