3D printing of Duel PSU Carriage needed

videoman3857

Full time elf
Joined
Apr 21, 2016
Messages
445
Location
Glass House Mountains
dscf2.png
Hi All.
With all the stuff I have to do to my light repairs and builds, babysitting the grandkids and working for a living, I have no time (or room) to remove my 3D printer from its packaging and learn how to use it.
Anyone out there in 3D printing land have the time to print me up 2 Duel PSU carriages ? (payable of course)
I have the stl files in Zip format that I can supply .
 
Last edited:

LawrenceDriveLights

Senior elf
Joined
Jan 16, 2018
Messages
581
Hi videoman3857,

I just printed 2 of these for myself which I could sell if you wanted (It is a awesome design).

Here is a couple of pictures

View: https://www.dropbox.com/s/irfp4hivdd1cn5b/Photo%204-8-18%2C%2012%2057%2037%20pm.jpg?dl=0


View: https://www.dropbox.com/s/qmderub0f652uy6/Photo%204-8-18%2C%2012%2054%2015%20pm.jpg?dl=0


These are to suit the meanwhile LRS-350 PSU

I will message you a cost

Regards
 

TassyDevil

New elf
Joined
Jul 10, 2018
Messages
14
Those look great, and would save me some time as well.
I just ordered the same power supply's.

Could I also buy 3 of the mounts from you?
 

videoman3857

Full time elf
Joined
Apr 21, 2016
Messages
445
Location
Glass House Mountains
They look great, but are for the low profile PSU.
The units I have are a higher profile and need the NES Duel carriage mount to which I have the sti files.
 

LawrenceDriveLights

Senior elf
Joined
Jan 16, 2018
Messages
581
Ok following on from @videoman3857 request for printing of 2 x PSU mounts.

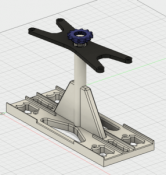
I decided to do a "test print" to first to make sure the print would go ok and also to confirm if the PSU would fit etc, as I had only printed the LRS Dual Power Supply mounts for my Meanwell LRS-350 PSU's (as shown in above pic in this thread).

@videoman3857 was looking at mounting 2 x "Chinese PSU" similar to these https://www.aliexpress.com/store/pr...ml?spm=2114.12010612.8148356.2.2b0c7277btIKxY

I did notice when slicing the files that the NES Dual Power Supply Carriage is a lot wider than the LRS Dual Power Supply Carriage and thus has a big effect on print time.

LRS type Carriage (not including top plate or nut) = approx. 8 hours to print.

NES type Carriage (not including top plate or nut) = approx. 11 hours to print.

This appears to manly due to significantly larger base for the NES type due to the wider PSU's.

Here is a quick pic to try and show the difference in width.

View: https://www.dropbox.com/s/szo28yudlazxgnp/Photo%209-8-18%2C%207%2001%2022%20pm.jpg?dl=0


I was having a think about this and thought about a possible way to re-design the CFOL design to maybe reduce the print time and to also make the carriage cheaper to post.

Before I start I would like to say I think the CFOL design is excellent design and I have printed a few for my own power supplies and it works great

The thought I had was the remove the large centre post and supports for this centre post from the design and come up with a alternative way of securing the top plate to the carriage.

I though I could use a simple 1/4" coach bolt of approx. 150mm in length (Ended up using a 6 mm x 150 mm long bolt).

This did mean I would have "reverse engineer" CFOL design, so out with the vernier's to take a few measurements and draw up a alternative design.

After a bit I come up with this design.

Essentially it is the same base as the CFOL design, but using a 6 mm x 150 mm bolt (the base of the carriage has a hex to fit the head of the bolt and prevent it from turning).

View: https://www.dropbox.com/s/zs6vf01v9e4w2xe/Photo%209-8-18%2C%206%2031%2047%20am.jpg?dl=0


I next looked at the top plate as the CFOL design whilst is good I wanted to tweak a little to fit the Chinese PSU a little better.

Hopefully you can see in the below pic the Chinese PSU doesn't have any screws holes in the far right hand side, and thus the extra width.

View: https://www.dropbox.com/s/c64rc1xtj0tmuat/Photo%209-8-18%2C%201%2024%2030%20pm.jpg?dl=0


Another design feature I also wanted to change was the countersunk holes in the top plate as I thought this may limit the screws you could use and also possible weaken the part (the top plate in the CFOL design is approx. 5mm thick, and the countersank holes are approx. 2.5mm deep only allowing 2.5mm material thickness) also the 4 mm screws I had handy where 10mm long and wouldn't fit in the countersunk holes.

So the top plate is very similar to the LRS style but without the countersank screw holes and a reduced diameter centre hole to suit the 6 mm centre bolt.

With the top plate sorted I had to make a new printable nut to suit, basically the same nut but with a hex to suit a inserted 6 mm nut for the centre bolt.

So this is what my final design is.

View: https://www.dropbox.com/s/sck7zs920f5nwbq/Photo%209-8-18%2C%205%2002%2034%20pm.jpg?dl=0


Nice and flat to enable cheaper postage and less printing time (approx. 30% reduction in print time for the Carriage).

Some more pics with some PSU fitted.

View: https://www.dropbox.com/s/w1w9h57imgwjlvj/Photo%209-8-18%2C%205%2006%2037%20pm.jpg?dl=0


View: https://www.dropbox.com/s/kynh556su14u7eu/Photo%209-8-18%2C%205%2005%2037%20pm.jpg?dl=0
 
Last edited:

David_AVD

Grandpa Elf
Community project designer
Generous elf
Joined
Jun 12, 2010
Messages
4,681
Location
Victoria Point (Brisbane)
Would a simple metal washer suffice under the top nut instead of printing the large one? Do you really need the nut to be removable without tools? You'd already have screw drivers out for the rest, so a spanner / socket for the top nut is not big deal imo.

For the screws holes, can they be printed as a proper countersunk profile instead of the original recessed (stepped) one? That would maintain the strength and still allow them to be flush mounting on the bottom?
 
Top