ACL Strobe Building

nzlongfellow

Dennis from NZ
Joined
Jan 2, 2014
Messages
538
Location
Lepperton, Taranaki
drlucas said:
Yes - I'm tinning the pad on the board (both - and + sides) then heating the underside of the leg and using a pair of pliers or helping hands to get it to sit flat on the board. I am however not heating the led itself or really letting it flow onto the top of the leg. That I suspect is where much of my problems are coming from. What is the tolerance for heat on those legs...can I heat it for a good 10sec or so without damaging it?


I had the same issue where I could lift them off after soldering.
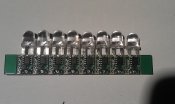
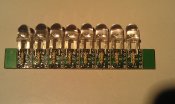
I then held the strobe in my "helping hands" by the glass with the side of the legs that face the board facing up. I then made sure I tinned the legs correctly. You do need an amount of heat to ensure they are tinned properly. I then tinned the board terminals then holding the full strip of circuit boards in my helping hands by the end pieces that will be discarded I held the strobe in place with my fingers and applied heat to the legs in turn. Got good solder flow.
I just used the resin core solder AAH suggested.
Sorry mine are all made to cannot show the process.
 

drlucas

Apprentice elf
Joined
Jul 31, 2013
Messages
58
Well...for now two have been revived, one has not..I measure the voltage on the strobe legs and see something strange (I think)...if I swap the + and - on my probe I get a -3.5 and a +5v reading. Is that normal? exact same place on the led too. :eek:


maybe i put the iron away for the night and come back at this tomorrow/on the weekend.
 

AAH

I love blinky lights :)
Community project designer
Joined
Dec 27, 2010
Messages
4,188
Location
Eaglehawk
The problem may not be entirely your building. I was just finishing off the rest of mine tonight and had several failures before I looked a bit harder. I was 99.9% confident that my wiring and soldering was fine. When I looked at my dead boards I noticed that the PIC was in around the wrong way. Out of the 144 I built I had 4 that I may have killed by having the power on the pics backwards. On the final panel that I haven't powered there is 4 pics out of the 8 that are around the wrong way. My pcb supplier will be getting a fair roasting tomorrow. I will post pictures tomorrow in this thread and the ACL Mk2 strobe thread.
 

drlucas

Apprentice elf
Joined
Jul 31, 2013
Messages
58
Looking forward to the pictures. My confidence may be restored (somewhat as I was having issues with some of the strobes popping off the board due to not enough solder)
 

DrNeutron

Just starting in this crazy hobby
Joined
Oct 19, 2012
Messages
228
Location
Glace Bay
I haven't started to build mine as of yet, watching this thread very closely....
I do have one question though....
Does anyone use a conformal coating on the PCB?
If so, I see 2 types for sale on Amazon. One is a urethane based and the other is a silicone based. Other than coating thickness can anyone see a reason not to go with the silicone based coating? The silicone coating is 1/3 the cost of the urethane and from what I have read performs as well (better under larger swings of heat).
Thanks.
 

arw01

Full time elf
Joined
Dec 30, 2013
Messages
384
Location
Eastern Washington
what are you guys using for wire, and (i have not looked) how are you continuing on to the next strobe? eg. can we put two sets of wires on the pcb pretty easy or ??
 

nzlongfellow

Dennis from NZ
Joined
Jan 2, 2014
Messages
538
Location
Lepperton, Taranaki
arw01 said:
what are you guys using for wire, and (i have not looked) how are you continuing on to the next strobe? eg. can we put two sets of wires on the pcb pretty easy or ??


I had some spare Ray Wu 3 pin non-waterproof connectors so cut the wires off, Easy as they were already tinned at one end as well.
I took 2mm speaker cable. Separated the two conductors for about 100mm, (leaving the insulation intact") then used my wire strippers to "break" the insulation and part it on each conductor thus giving exposed wires for about 5-6mm.
I then wrapped the strobe tails around the bare wire and soldered then, +ve tail on Conductor +ve and -ve tail on -ve conductor. I did this every 800 to 900mm so all 100 strobes are in parallel on some 90 metres of cable. I then wrapped rubber "self sealing" tape around each connection then around the two conductors to tie them back together. The whole assembly then rolls up on a garden hose drum.
 

kenlmcse

Lightshowpro Developer
Joined
Feb 21, 2011
Messages
23
Location
Gilbertsville, PA
What is the best way/product to seal them with. I used hot glue a couple of them quit working after the heat from the glue... So I quit sealing so I don't break more of them.
 

nzlongfellow

Dennis from NZ
Joined
Jan 2, 2014
Messages
538
Location
Lepperton, Taranaki
KenL said:
What is the best way/product to seal them with. I used hot glue a couple of them quit working after the heat from the glue... So I quit sealing so I don't break more of them.


Here is a post I did on my build.
I just sealed the cable to the outer shell. That way I can take them apart if needed by putting a little heat on the shrink wrap. Not saying it is the best but having never done builds like this I came up with what I had on hand.


http://auschristmaslighting.com/forums/index.php?topic=6196.105 (Page 8)
 

AAH

I love blinky lights :)
Community project designer
Joined
Dec 27, 2010
Messages
4,188
Location
Eaglehawk
Re. the few people having problems with the strobes and leds breaking/falling off it's quite likely that the solder being used has rubbish flux in it, the soldering iron doesn't have enough heat in due to being a low wattage one or there isn't being enough heat being put into the led. It's actually a fair bit of metalwork on the led and it takes a fair bit of heat. There should be a nice smooth joint with no obvious line between the led and the solder. Hot melt glue melts at a lot lower melting point than solder so it will be a mechanical fail of the joint rather than the solder melting.
WettedJoint.jpg

I'm not planning on using real long lengths of strobe strings so I used fairly light duty figure 8. I firstly pre-tinned the + and - pads on both sides of the boards and stripped, tinned and trimmed the figure 8 wire. I attached the 8 wires (200mm long in my case) to one side of the board and then flipped the board over and soldered the loops to the next board all the way through. I then did a visual check to make sure that all the black stripe wires were connected to the - terminals and then as a final check I did a continuity check to make sure that all the -ve were connected to the -ve and weren't connected to the +ve. I then checked each strip of 8, snapped them apart and slipped them into the pixel sleeves. So far I've only sealed 3 strobes up and these I did with a bit of leftover polyester resin. This is simply squirted into the sleeve using a catheter tip 60ml syringe.

Despite my caution I ended up with some dud boards which running over with a magnifier showed my Chinese supplier used a random insertion method for a few boards by the looks. I've popped a post up at https://auschristmaslighting.com/threads/acl-mk2-strobes.6458/page-2#post-58436 which shows the PIC that they put in backwards on some boards.
 

Attachments

  • IMAG1580.jpg
    IMAG1580.jpg
    678.9 KB · Views: 20
  • IMAG1581.jpg
    IMAG1581.jpg
    752.8 KB · Views: 17
  • IMAG1582.jpg
    IMAG1582.jpg
    698.7 KB · Views: 17
  • IMAG1585.jpg
    IMAG1585.jpg
    663.4 KB · Views: 17

kenlmcse

Lightshowpro Developer
Joined
Feb 21, 2011
Messages
23
Location
Gilbertsville, PA
I tested every single item as I worked with it. Meaning, confirm light worked with the resiter, then soldered, tested the board. So far good. Then I started gluing them together, testing one at a time. Three of the 6 I glued did nothing on the initial test (glue still wet). Then I retested those three after the glue dried and the all are on all the time.

What I am wondering is if the glue got the chip too hot or the wet glue crossed the + - and burned out the chip...

It might have had more glue in these 3 which is why the glue was still wet... Maybe I should try letting them cool before retesting.

Thoughts?
 

AAH

I love blinky lights :)
Community project designer
Joined
Dec 27, 2010
Messages
4,188
Location
Eaglehawk
It was the right link originally but I was having a bit of a brain fade at the time and put the post in the wrong place and had to get ryanschristmaslights to move it for me.
 

Alice

New elf
Joined
Nov 18, 2014
Messages
2
dougd said:
Here is how i did mine. Had 1 or 2 fails out of my 96 strobes.


Put the resistor in on the non chip side.


Soldier it on the same side. Soldier might fill the plus side of the + 5 volts.


Next clip the short side of the led 1/8 inch past the wide part.


Cut the longer side 1/4 past the wide part.


Tin the 2 pads on the non chip side where the led soldiers to.


Soldier the led to the board paying attention to + and -


Soldier a green wire to the - side of the board opposite the LED.


Soldier a red wire to the + side again opposite side of the board as the LED.


Hook red wire to +5 volts and the green wire to - side 5 volts.


Stobeing should start immediately.
that is such a good experience,i think u did a great job. ;)


galaxy s5 mini hülle
 

DrNeutron

Just starting in this crazy hobby
Joined
Oct 19, 2012
Messages
228
Location
Glace Bay
Just wanted to post an update on my strobe building experience.....
1st off I want to say a big THANKYOU to Alan!.
I had 17 on one panel with the pics reversed and Alan sent me spare pics along with a nice X-mas card! :D
I was actually able to de-solder all the backwards pics and re-solder them with only one failure (it was cracked).
Assembly was pretty straight forward and waterproofing went well with one exception....Like a few have already posted the LED does not like hot glue applied directly to it (after assembly I found 3 blown due to direct contact with glue). I found the best thing to do was put a bead of glue on the sleeve and then slip it 1/2 way into C9 and apply a bit more before sliding heat shrink over it. Then I filled the sleeve with silicone and applied heat to shrink the tubing. No issues and these strobes are the bomb!
;) :D
 
Top