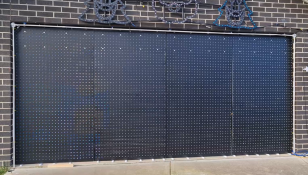
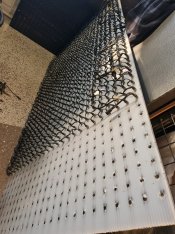
So... I did the totally-stupid-and-not-recommended-time-sink way of doing a custom matrix.
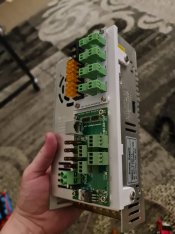
The plan was to make a 100 x 44 matrix to fit a 4.75m wide garage (so... 47mm separation, just under 2") so that in sections I could keep all wiring to one side of the panel. To handle power injection, I ordered strings with power injection wires so that I could inject what I expected to be long runs (600 odd pixels).
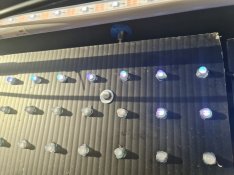
Bunnings had the large sheets of twin wall for $29 each so figured I'd use that to make the panels, and a few cans of Rustoleum black matte spray paint. I 3D-Printed a 4x4 jig with a 47mm separation between the 12mm holes with the first quadrant with 'pegs' to fit in previous holes. This worked to an extent, but as the Jig worn down towards the end, it came up a little 'wavey'. For the remaining three sheets, I clamped them together and drilled straight through the 1,100 holes so that they would roughly be identical. After cutting them down to size, I flipped two so that each 'edge' would line up and well... from viewing distance looked fairly straight on the panel.
Mounting was a tremendous amount of procrastination. I wanted originally to go the temporary fencing route, but I didn't know if this'd work and I'd rather not turn my brick into Swiss Cheese if I could help it. After a lot of research for different mounting options, a lot of e-mails, I gave up on that idea and ended up getting some very strong magnets off Amazon to hold up a sheet with 1,100 magnets on them (https://www.amazon.com.au/dp/B08GCFSFJC) and drilled in several of these (https://www.bunnings.com.au/flexi-storage-home-solutions-300mm-black-double-slot-wall-strip_p2583635) at the top of each panel and cable-tied to the magnetic hook. A crude job that worked - you just need to weight / tie the bottom so that wind doesn't catch and tear it down (and also assumes you have a large lintel capable of giving you some good magnetic strength - those Amazon ones are strong.
So... yeah - a massive time sink to drill it all by hand, spray paint, populate the pixels but I was happy with the outcome. As I'll need to replace the pixels next year, I'll probably give it another go but do sections and magnet it to the garage door instead. I probably won't bother with upgrading the spring or anything - just unplug the motor for the few weeks and manually hoist it up if need be. I'm also in the market for a smallish CNC machine next year so I might give it another custom go.
I did mine for effects - and for that, it's absolutely brilliant (when you're not losing several pixels a night) and hopefully given more time next year some more 8-bit / pixel art graphics. If you wanted to do video, the ~1.8 inch separation isn't great unless you're ~15m away from it. The flashing lights sequence though was alright from the footpath.


