
gerry
Senior elf
- Thread starter
- #16
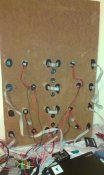
gerry said:Now that I have this working , I was wondering how to connect the 8 panels to 2 ports of the Octo ie 4 and 4 .
It turned out to be quite simple .
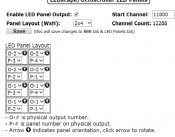
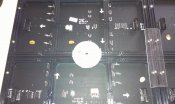
For the 4 * 4 matrix layout (in portrait mode) , I had the bottom two with the vertical arrows (on the back of the panel) pointed upwards and for the top two , I had the panels 'upside down' ie with the vertical arrows (on the back of the panel) pointed downwards . The BBB config then needs to reflect the orientation.
Connected this to Port 1 of the Octoscroller
Repeated the same for Port 2 for the next set of 4 panels.
I will post a picture of the panel layout and BBB config setup this evening and update when I have all panels together.
")