Hi All,
About time I created a post with all that i have learnt so far and how my journey is unfolding.
In 2022 i got into the Christmas spirit buying a bunch of standard led lights and ornaments and decorated the back yard. Then in the Boxing day sales this evolved into buying more lights and ornaments. Sometime before the new-year i started googling Christmas lights and stumbled into the world of pixels. It was eye opening and i just knew it was something i wanted to do. Lots of googling and several reads of the 101 manual i decided xlights was the way to go.
I saw a previous post showing a detailed list of everything they had bought where it worked out to be around the $3000 mark for 2000 pixels. So i thought a $5000 budget would get me something quite awesome. Little did i know how that budget would grow!
The Layout
Enter my first xlights 2D layout.
Quite respectable and my final layout hasn't changed the basics to much. I did learn a lot about modelling and how to set it all up along the way. It's more complicated, yet more simple at the same time. Xlights is feature rich and figuring out how it works has been an journey, one of which i'm only just understanding.
My wife wanted all the stars/snow flakes and i was happy to accommodate. After this, we both spent quite a lot of time going through YouTube and the forum to see what layouts we liked and also to see what sequence styles we liked (purchasing sequences this year at least). The discovery of Magical Light Shows really influenced our layout and we mostly just adopted their layout which really increased the number of pixels.
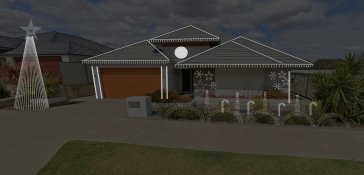
Upgrade to 3D and final 2023 layout
After reading up about the benefits of 3D, i got to work on a detailed Sketchup model and brought that into xlights. Quite the learning curve working in 3D but managed to get it sorted.
So below is how the 2023 layout is looking. Tune To sign will be moved but thats about it. I keep thinking about a matrix or two, but it might just have to wait till 2024.
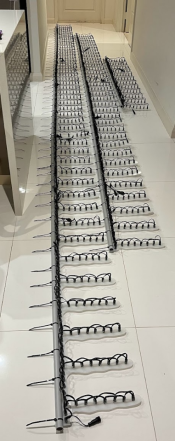
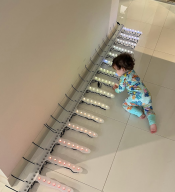
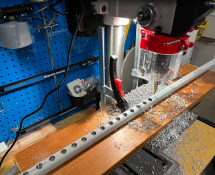
This has really increased the complexity for mounting being on the roof so much, but i've done lots of research and believe i have a way forward for all times. Time will tell!
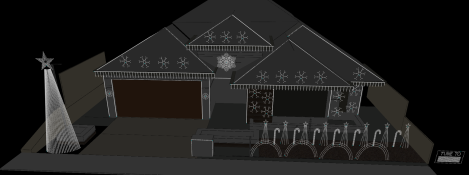
Props and outlines
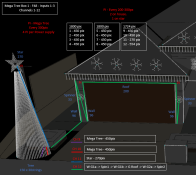
Mega Tree - 150x30 + 270star
Archs - 4 x 126pix 3ring arch
Trees - 8 x 105pix 1.27m
Canes - 7 x 99pix
Flakes - 20 x 48pix
Showstopper flake - 750pix
Spinner - 2 x 30pix
Icicles - 20m @ approx 87pix/m = 1300pix
Roof/house outline - 1 inch spacing - 57m - 2400pix
Tune to - 329pix
Total - 12,943pix
Orders placed for all of the above and now have about 90% of everything in hand for building. Only thing yet to arrive are the custom strings i've ordered.
The Cost
For better or worse i have been tracking every dollar spent and its very eye opening on how quickly things add up. The total is waaaaay above the $5000 budget i had when i started, there has been a few conversations with the wife as the totals have gone up. Thankfully she is very understanding and supportive of my hobby.
I've seen it repeated a number of times that an all in cost of $1/pixel is about right. Well so far i've ordered 13,500 pixels with a plan to use 12,943 of them. Costs to date $12,846, with an estimated $840 to go. Below is a list of items that i have ordered with the coloured items still to be ordered. There will be more things to order, but hopefully i've considered most things. I've not shown individual prices but you get the idea.
I've chased the savings as much as possible with many many aliexpress orders. Thankfully i have the time to wait for the 1-2month shipping on some items.

Controller Boxes and How its Connected
I wanted to get everything sorted as much as possible on paper before i building too much and figuring out cable runs, PI, controller box locations and how its all connected.
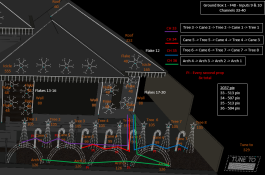
Everything will be connected to a single F48V4 in the roof that has easy enough access to the roof ( i have roof access from a ladder in the garage). From there i will have 3 additional controller boxes with either 2/3 receivers in each box. Show will be running at 40ffs so i've limited the max pixels per port accordingly. Its looking like my max is 616 on a single port.
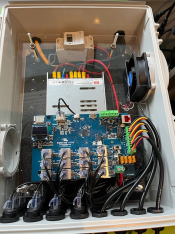
Box 1 Roof - F48V4
- 4 channels used directly off the F48 to drive the top left of the house.
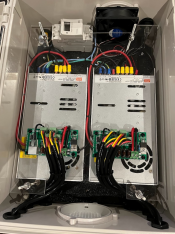
- 1x600w PS
- Channels 45-48
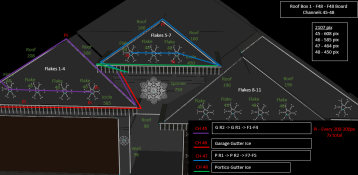
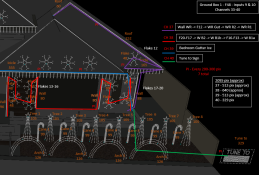
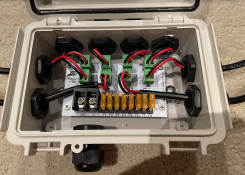
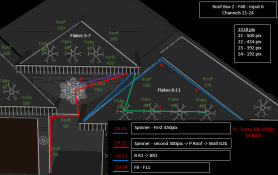
Box 2 Roof - 2 receivers (only one in use, second for expansion at later date)
- F48 input 6
- Channel 21-24
- 2x600w PS
About time I created a post with all that i have learnt so far and how my journey is unfolding.
In 2022 i got into the Christmas spirit buying a bunch of standard led lights and ornaments and decorated the back yard. Then in the Boxing day sales this evolved into buying more lights and ornaments. Sometime before the new-year i started googling Christmas lights and stumbled into the world of pixels. It was eye opening and i just knew it was something i wanted to do. Lots of googling and several reads of the 101 manual i decided xlights was the way to go.
I saw a previous post showing a detailed list of everything they had bought where it worked out to be around the $3000 mark for 2000 pixels. So i thought a $5000 budget would get me something quite awesome. Little did i know how that budget would grow!
The Layout
Enter my first xlights 2D layout.
Quite respectable and my final layout hasn't changed the basics to much. I did learn a lot about modelling and how to set it all up along the way. It's more complicated, yet more simple at the same time. Xlights is feature rich and figuring out how it works has been an journey, one of which i'm only just understanding.
My wife wanted all the stars/snow flakes and i was happy to accommodate. After this, we both spent quite a lot of time going through YouTube and the forum to see what layouts we liked and also to see what sequence styles we liked (purchasing sequences this year at least). The discovery of Magical Light Shows really influenced our layout and we mostly just adopted their layout which really increased the number of pixels.

Upgrade to 3D and final 2023 layout
After reading up about the benefits of 3D, i got to work on a detailed Sketchup model and brought that into xlights. Quite the learning curve working in 3D but managed to get it sorted.
So below is how the 2023 layout is looking. Tune To sign will be moved but thats about it. I keep thinking about a matrix or two, but it might just have to wait till 2024.
This has really increased the complexity for mounting being on the roof so much, but i've done lots of research and believe i have a way forward for all times. Time will tell!

Props and outlines
Mega Tree - 150x30 + 270star
Archs - 4 x 126pix 3ring arch
Trees - 8 x 105pix 1.27m
Canes - 7 x 99pix
Flakes - 20 x 48pix
Showstopper flake - 750pix
Spinner - 2 x 30pix
Icicles - 20m @ approx 87pix/m = 1300pix
Roof/house outline - 1 inch spacing - 57m - 2400pix
Tune to - 329pix
Total - 12,943pix
Orders placed for all of the above and now have about 90% of everything in hand for building. Only thing yet to arrive are the custom strings i've ordered.
The Cost
For better or worse i have been tracking every dollar spent and its very eye opening on how quickly things add up. The total is waaaaay above the $5000 budget i had when i started, there has been a few conversations with the wife as the totals have gone up. Thankfully she is very understanding and supportive of my hobby.
I've seen it repeated a number of times that an all in cost of $1/pixel is about right. Well so far i've ordered 13,500 pixels with a plan to use 12,943 of them. Costs to date $12,846, with an estimated $840 to go. Below is a list of items that i have ordered with the coloured items still to be ordered. There will be more things to order, but hopefully i've considered most things. I've not shown individual prices but you get the idea.
I've chased the savings as much as possible with many many aliexpress orders. Thankfully i have the time to wait for the 1-2month shipping on some items.

Controller Boxes and How its Connected
I wanted to get everything sorted as much as possible on paper before i building too much and figuring out cable runs, PI, controller box locations and how its all connected.
Everything will be connected to a single F48V4 in the roof that has easy enough access to the roof ( i have roof access from a ladder in the garage). From there i will have 3 additional controller boxes with either 2/3 receivers in each box. Show will be running at 40ffs so i've limited the max pixels per port accordingly. Its looking like my max is 616 on a single port.
Box 1 Roof - F48V4
- 4 channels used directly off the F48 to drive the top left of the house.
- 1x600w PS
- Channels 45-48

Box 2 Roof - 2 receivers (only one in use, second for expansion at later date)
- F48 input 6
- Channel 21-24
- 2x600w PS


