3D printing Files Sharepoint

You write up got me to give it a try with what I had at home and this is what I end up with
Was short by a couple of pixels but it appears alright
I also mount it on a board so I could mount it outside and not break in the wind
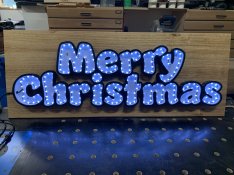
Do you have a photo of your light layout. Was just notified my lights are in the country, so should be there when I head home next week. looking for inspiration
 
I placed the lights the edge of the letters and then used the light Show Hub https://www.lightshowhub.com/tools/xlights-custom-model-builder to form a model of the lights by counting each pixel and forming each letter as a sub model and then created Groups like Merry, every second letter and so one to do different effects on
As you can see I was a bit short on LED so the letter C looks a bit odd but once the cover is on and you stand back it dosen't stand out that bad, not for somthing made with what I had spare at the time
I did end up hot glue the top on as the keep on falling off when I moved the prop around
 

Attachments

  • IMG_0852.jpg
    IMG_0852.jpg
    937.9 KB · Views: 9
So, correct me if I am wrong, you doubled back on the letters once you hit M. One section does the bottom half of each letter and the other the top. With the exception being A and S which folded back on themselves before heading up to Y
 
That's not quite I started with C on the bottom half all the way to s and the back to m in "Christmas" then to the top of Y to the M on Merry where it double back along the bottom to the m of Christmas where it go along the top of "Christmas" back to C not forgetting the dot in i where it just loops around the dot
I also joined the ends to power blance (+ to + and - to - ) but not the data input
 
Back
Top