LawrenceDriveLights
Senior elf
- Joined
- Jan 16, 2018
- Messages
- 582
As part or our Display addition for 2019 was a Junior MegaTree (180 degree 50 nodes x 24 strands).
Here is what it looked liked (yes the compulsory MegaTree picture with butterfly effect).
 View: https://www.dropbox.com/s/tz9wzu9k0z0hkvr/Photo%2025-11-19%2C%208%2046%2051%20pm.jpg?dl=0
Background;
This was part of the addition to our Display which included extending into our Neighbours yard at short notice, so this may not be the ideal way or most cost effective way to build.
Specs;
50 12v WS2811 Bullet Nodes per Strand with 2 inch Pixel Spacing.
24 Strands @ 180 Degree viewing angle
Boscoyo Mounting Strips
Approx Height 3.5m
Approx Base Diameter 1.7m
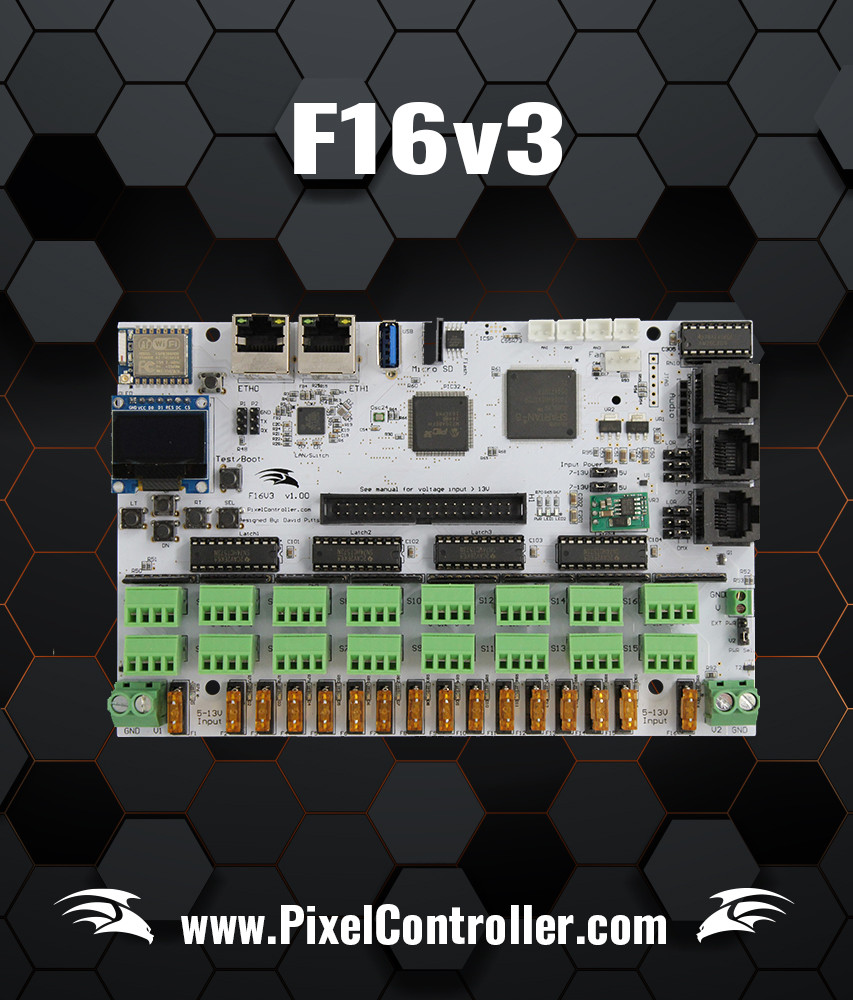
Falcon F16V3 Controller in a ammo box enclosure
Topper lifted via winch
As per background this was built with some spares / scrap materials I had due to limited build time.
Here is a daytime pic
 View: https://www.dropbox.com/s/1emcanyu6sn7n3z/Photo%2025-11-19%2C%203%2031%2030%20pm.jpg?dl=0
So starting with the pole and base
Pole used was a 4m 35mm thick wall pipe (as we had it already). approx. cost for new $50
'Walter Monkhouse' Portable hole design used as final location of MegaTree was decided until other props located in yard. http://www.magicchristmas.org/portable-hole.html
Note: Similar product links below but may have used slightly different products so if copying make sure you get the appropriate hardware that suits your build.
200 x 50 mm timber sleeper. (again had it left over from other project) similar to this https://www.bunnings.com.au/200-x-50mm-treated-pine-sleeper-2-4m_p8500230
3 x 20kg rapid set Concrete. https://www.bunnings.com.au/bastion-20kg-quick-set-concrete_p0760289
4 x 250 mm Eye Bolts https://www.bunnings.com.au/zenith-12-7-x-250-x-30mm-zinc-plated-eye-bolt-1-pack_p4220687
4 x D Shackles https://www.bunnings.com.au/zenith-8mm-galvanised-d-shackle_p4220613
4 x Turnbuckles https://www.bunnings.com.au/zenith-8mm-galvanised-hook-and-eye-turnbuckle_p4220792
4 x Steel Dropper https://www.bunnings.com.au/whites-90cm-premium-black-ultrapost_p3041912
Sleeve for pole in portable hole 38mm ID pipe (again used what we had)
Offcut of mdf used for base of portable hole
plus some large screw like these to frame up hole https://www.bunnings.com.au/buildex...le-head-batten-timber-screws-25-pack_p2420556
So portable hole ended up looking like this, basically a timber sleeper box frame with eye bolts with the turnbuckles and D shackles and steel droppers to secure the portable hole to the ground, this is a must to secure base of the pole as per Walter Monkhouse's instructions.
 www.dropbox.com
Next was topper to secure the strips and this needs to move up and down the pole to make via a hand boat type winch
I had a Boscoyo steel topper 11" (48 hole)

 www.boscoyostudio.com
I did need to drill the centre out to allow it to slide up and down the pole
Used a 40mm metal hole saw
 View: https://www.dropbox.com/s/mjm7tj7ddtr0bf3/Photo%2016-11-19%2C%201%2050%2050%20pm.jpg?dl=0
Also need some bolts to attach the Boscoyo strips to the topper local shops didnt have hook bolts so used 8mm hook type dynabolts and used a additional nut to secure to topper.
Next was a hand cable type boat winch to raise and lower topper. https://www.ebay.com.au/itm/I-Max-1...784431?hash=item3f5539b32f:g:AyoAAOSw14xWGfDY
Made a simple bracket from a off cut of 5mm aluminium to bolt the winch to and then used some car exhaust clamps to hold this bracket to the pole
Exhaust Clamps (make sure they suit your pole) https://www.supercheapauto.com.au/p/swd-spareco-exhaust-clamp---c5-41mm/9107.html
Final piece of the puzzle for the pole is a simple 50mm cable pulley to be bolted to the top of the pole. https://www.bunnings.com.au/zenith-50mm-zinc-plated-fixed-pulley-1-pack_p4220773
Here is a picture of the pole with the winch and pulley setup (Note doesn't show bolts in the topper for the strips)
 View: https://www.dropbox.com/s/vwfdoo6ucoq9uhc/Photo%2017-11-19%2C%2012%2001%2056%20pm.jpg?dl=0
Note how the winch cable passes thru the topper then up to the pulley and back down to the steel topper.
Base ring then required to attach the bottoms of the strip to, this I had from my other MegaTree as I made a larger one.
Made from some 25mm galv pipe bent into a semi circle with cheap pipe bender I had and drilled holes at even spacings to allow a hook to be used to attach strip to.
Did need some 6mm J Bolts with the extra threaded section does allow some minor adjustment of strips. https://www.bunnings.com.au/zenith-6-x-100-x-13mm-zinc-plated-j-bolt_p4220724
 View: https://www.dropbox.com/s/kyycexj5lo2bgm8/Photo%2020-11-19%2C%204%2041%2057%20pm.jpg?dl=0
Used 5 or 6 Steel Droppers and bolted the base ring to these. https://www.bunnings.com.au/whites-135cm-premium-black-ultrapost_p3041459
Some people do use old Trampoline bases etc but already had the base ring, just check to see if the trampoline base suits your tree in particular the diameter
Then last piece of the Junior MegaTree hardware and the most important is the guy wires to secure the MegaTree we simply used some ratchet straps and secured back to existing fense posts but most use 3 or 4 mm steel cable from Bunnings and again maybe some steel droppers. Yes the observant people will notice we only using 2 straps as guy wires in the pictures, but that was the risk we decided to take and not recommended.
Nest we move on to the pixels used, controller, enclosure etc.
Now this may cause some debate but this what we used
Pixels
100 count 12V WS2811 18AWG wire Bullet Pixels similar to these. https://www.aliexpress.com/item/32741695259.html?spm=2114.12010612.8148356.2.676d678aSRoDxj
I used the bullet type pixel rather than the square type on my larger MegaTree as they were the pixels I already had.
We used 50 pixels up on one strip and 50 pixels back down the next.
Also used some premade extension leads from the Falcon F16 pixel controller and the strings as the controller mounted near the base of the Megatree. https://www.aliexpress.com/item/134...=a2g0o.store_home.smartJustForYou_728718005.2
Used to tried and tested Boscoyo pixel mounting Strips. https://www.boscoyostudio.com/index.php?main_page=product_info&cPath=6&products_id=2
and the MISR aluminum clips at each end of the strips. https://www.boscoyostudio.com/index.php?main_page=product_info&products_id=37
As most who have built a MegaTree one of the time consuming things is actually pushing the pixels into the strip.
I found this jig posted on thingverse and 3D printer it and it helped as using bullets.
 View: https://www.dropbox.com/s/k8avucoynkvoq1n/Photo%2013-11-19%2C%202%2022%2013%20pm.jpg?dl=0
Falcon F16V3 pixel controller supplier data and power from Meanwell 12V PSU.
1 String of 100 pixels connected to one output of the controller and did not require any power injection for our setup.

2 x Meanwell LRS-350-12 PSU
Need something to mount the pixels controller and PSU in, I used a MTM ammo crate as already had one.
Need some pigtails from the pixel controller, cable glands, fans and vents for enclosure etc, and some other small bits and pieces (very similar setup to my other enclosures).
A Star was then added to the top (could have used a larger Star but again time poor)
23" ChromaStar (90 Nodes) https://www.extremelightingdisplays.com.au/shop/stars/chromastar-23/
Used 12V WS2811 pixels same as Megatree and powered of a output from the pixel controller, did have to use a longer lead to reach Star at top of tree.
Star simply mounted via cable ties.
I have listed the strips and clips from Boscoyo but did obtain some from Troy the Australian Distributer / Manufacturer of Boscoyo Products and Troy helped us by shipping the products we needed very quickly.
 www.extremelightingdisplays.com.au
Overall happy with the results in particular the ratio between the height and base etc.
Did have plans to have the base ring mounted higher off the ground and thus the reason for the gap between the topper and star by using star droppers.
Also benefit of the portable hole as we are going to move the location of this MegaTree this season to suit the expanding layout.
I am sure I have missed a couple of things but hopefully gives some people a idea on how we went about building a MegaTree.
The Junior MegaTree can be seen at about the 18 minute mark of our 2019 Behind the Scenes video.
https://www.youtube.com/watch?v=TZOonAMNjzo&t=653s
Disclaimer: I am not a expert and if you follow this build please remember to use some common sense and if unsure seek some advice etc as there has been lots of reports of MegaTree's falling down in particular the larger ones as we all know, got to have a bigger MegaTree than the everybody else
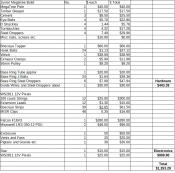
I have done a quick list of items purchased for this build
Now I will say this is not the cheapest way of building a prop like this and lots of the costs could be cut if careful planning was done (so dont try and build a one in a couple of days and I probably have missed a few things.
However we have allowed room for future expansion in particular with the pixel controller etc so that must be adjusted for in costings, I also have not included any postage costs and tried to convert to $AUD for some items.

Here is what it looked liked (yes the compulsory MegaTree picture with butterfly effect).

Background;
This was part of the addition to our Display which included extending into our Neighbours yard at short notice, so this may not be the ideal way or most cost effective way to build.
Specs;
50 12v WS2811 Bullet Nodes per Strand with 2 inch Pixel Spacing.
24 Strands @ 180 Degree viewing angle
Boscoyo Mounting Strips
Approx Height 3.5m
Approx Base Diameter 1.7m
Falcon F16V3 Controller in a ammo box enclosure
Topper lifted via winch
As per background this was built with some spares / scrap materials I had due to limited build time.
Here is a daytime pic

So starting with the pole and base
Pole used was a 4m 35mm thick wall pipe (as we had it already). approx. cost for new $50
'Walter Monkhouse' Portable hole design used as final location of MegaTree was decided until other props located in yard. http://www.magicchristmas.org/portable-hole.html
Note: Similar product links below but may have used slightly different products so if copying make sure you get the appropriate hardware that suits your build.
200 x 50 mm timber sleeper. (again had it left over from other project) similar to this https://www.bunnings.com.au/200-x-50mm-treated-pine-sleeper-2-4m_p8500230
3 x 20kg rapid set Concrete. https://www.bunnings.com.au/bastion-20kg-quick-set-concrete_p0760289
4 x 250 mm Eye Bolts https://www.bunnings.com.au/zenith-12-7-x-250-x-30mm-zinc-plated-eye-bolt-1-pack_p4220687
4 x D Shackles https://www.bunnings.com.au/zenith-8mm-galvanised-d-shackle_p4220613
4 x Turnbuckles https://www.bunnings.com.au/zenith-8mm-galvanised-hook-and-eye-turnbuckle_p4220792
4 x Steel Dropper https://www.bunnings.com.au/whites-90cm-premium-black-ultrapost_p3041912
Sleeve for pole in portable hole 38mm ID pipe (again used what we had)
Offcut of mdf used for base of portable hole
plus some large screw like these to frame up hole https://www.bunnings.com.au/buildex...le-head-batten-timber-screws-25-pack_p2420556
So portable hole ended up looking like this, basically a timber sleeper box frame with eye bolts with the turnbuckles and D shackles and steel droppers to secure the portable hole to the ground, this is a must to secure base of the pole as per Walter Monkhouse's instructions.
Dropbox
Next was topper to secure the strips and this needs to move up and down the pole to make via a hand boat type winch
I had a Boscoyo steel topper 11" (48 hole)

Elevate Your Displays with Coro Props
Unleash the magic of Coro props, Pixel props, and animated holiday lighting for Christmas and Halloween. Create unforgettable displays with xLights, Kulp Lights, Light-O-Rama, and Falcon systems. Transform your home with our holiday decor and props.
I did need to drill the centre out to allow it to slide up and down the pole
Used a 40mm metal hole saw

Also need some bolts to attach the Boscoyo strips to the topper local shops didnt have hook bolts so used 8mm hook type dynabolts and used a additional nut to secure to topper.
Next was a hand cable type boat winch to raise and lower topper. https://www.ebay.com.au/itm/I-Max-1...784431?hash=item3f5539b32f:g:AyoAAOSw14xWGfDY
Made a simple bracket from a off cut of 5mm aluminium to bolt the winch to and then used some car exhaust clamps to hold this bracket to the pole
Exhaust Clamps (make sure they suit your pole) https://www.supercheapauto.com.au/p/swd-spareco-exhaust-clamp---c5-41mm/9107.html
Final piece of the puzzle for the pole is a simple 50mm cable pulley to be bolted to the top of the pole. https://www.bunnings.com.au/zenith-50mm-zinc-plated-fixed-pulley-1-pack_p4220773
Here is a picture of the pole with the winch and pulley setup (Note doesn't show bolts in the topper for the strips)

Note how the winch cable passes thru the topper then up to the pulley and back down to the steel topper.
Base ring then required to attach the bottoms of the strip to, this I had from my other MegaTree as I made a larger one.
Made from some 25mm galv pipe bent into a semi circle with cheap pipe bender I had and drilled holes at even spacings to allow a hook to be used to attach strip to.
Did need some 6mm J Bolts with the extra threaded section does allow some minor adjustment of strips. https://www.bunnings.com.au/zenith-6-x-100-x-13mm-zinc-plated-j-bolt_p4220724

Used 5 or 6 Steel Droppers and bolted the base ring to these. https://www.bunnings.com.au/whites-135cm-premium-black-ultrapost_p3041459
Some people do use old Trampoline bases etc but already had the base ring, just check to see if the trampoline base suits your tree in particular the diameter
Then last piece of the Junior MegaTree hardware and the most important is the guy wires to secure the MegaTree we simply used some ratchet straps and secured back to existing fense posts but most use 3 or 4 mm steel cable from Bunnings and again maybe some steel droppers. Yes the observant people will notice we only using 2 straps as guy wires in the pictures, but that was the risk we decided to take and not recommended.
Nest we move on to the pixels used, controller, enclosure etc.
Now this may cause some debate but this what we used
Pixels
100 count 12V WS2811 18AWG wire Bullet Pixels similar to these. https://www.aliexpress.com/item/32741695259.html?spm=2114.12010612.8148356.2.676d678aSRoDxj
I used the bullet type pixel rather than the square type on my larger MegaTree as they were the pixels I already had.
We used 50 pixels up on one strip and 50 pixels back down the next.
Also used some premade extension leads from the Falcon F16 pixel controller and the strings as the controller mounted near the base of the Megatree. https://www.aliexpress.com/item/134...=a2g0o.store_home.smartJustForYou_728718005.2
Used to tried and tested Boscoyo pixel mounting Strips. https://www.boscoyostudio.com/index.php?main_page=product_info&cPath=6&products_id=2
and the MISR aluminum clips at each end of the strips. https://www.boscoyostudio.com/index.php?main_page=product_info&products_id=37
As most who have built a MegaTree one of the time consuming things is actually pushing the pixels into the strip.
I found this jig posted on thingverse and 3D printer it and it helped as using bullets.

Falcon F16V3 pixel controller supplier data and power from Meanwell 12V PSU.
1 String of 100 pixels connected to one output of the controller and did not require any power injection for our setup.
2 x Meanwell LRS-350-12 PSU
Need something to mount the pixels controller and PSU in, I used a MTM ammo crate as already had one.
Need some pigtails from the pixel controller, cable glands, fans and vents for enclosure etc, and some other small bits and pieces (very similar setup to my other enclosures).
A Star was then added to the top (could have used a larger Star but again time poor)
23" ChromaStar (90 Nodes) https://www.extremelightingdisplays.com.au/shop/stars/chromastar-23/
Used 12V WS2811 pixels same as Megatree and powered of a output from the pixel controller, did have to use a longer lead to reach Star at top of tree.
Star simply mounted via cable ties.
I have listed the strips and clips from Boscoyo but did obtain some from Troy the Australian Distributer / Manufacturer of Boscoyo Products and Troy helped us by shipping the products we needed very quickly.
Extreme Lighting Displays – Christmas Light Accessories
 www.extremelightingdisplays.com.au
Overall happy with the results in particular the ratio between the height and base etc.
Did have plans to have the base ring mounted higher off the ground and thus the reason for the gap between the topper and star by using star droppers.
Also benefit of the portable hole as we are going to move the location of this MegaTree this season to suit the expanding layout.
I am sure I have missed a couple of things but hopefully gives some people a idea on how we went about building a MegaTree.
The Junior MegaTree can be seen at about the 18 minute mark of our 2019 Behind the Scenes video.
https://www.youtube.com/watch?v=TZOonAMNjzo&t=653s
Disclaimer: I am not a expert and if you follow this build please remember to use some common sense and if unsure seek some advice etc as there has been lots of reports of MegaTree's falling down in particular the larger ones as we all know, got to have a bigger MegaTree than the everybody else
I have done a quick list of items purchased for this build
Now I will say this is not the cheapest way of building a prop like this and lots of the costs could be cut if careful planning was done (so dont try and build a one in a couple of days
However we have allowed room for future expansion in particular with the pixel controller etc so that must be adjusted for in costings, I also have not included any postage costs and tried to convert to $AUD for some items.

Last edited:


