G'day from Tassie

Whitey-

Apprentice elf
Joined
Sep 4, 2023
Messages
67
Location
Launceston, Tasmania
Remember the (obvious) fact that it's much easier to paint the prop while it's empty of pixels. So if you're going to do it -- you need to paint first.
I appreciate the obvious, it's not always to me 😂. I did think that, but I'll make a note now, as it's entirely possible I'll get excited and forget!

For anyone reading this in the future, here's a thread with some peoples experience doing just this as a reference point.
This paint and prime stuff is the best. Water based paint will scratch off PVC easily, even with a sand. Oil based spray such as the cheap “fiddly bits” cans ($5 ea) is good but still scratches a bit. But this stuff is like multiple coats in one. You pay for it though, and they don’t have “hide in the garden green”!
Thank you, I'll go buy some once my coro ships. Apparently my Light It Up order is already with Auspost - Paul doesn't mess around!
One other thing to note as well is that there's a huge mistake made as well in the spreadsheet above - which is the assumption that a Meanwell LRS-350 is a 350W power supply.
That's just the model range, which is typically 350W at the higher voltages. But at 5V, it's only 60A, if you look at the data sheet.
The AliExpress Chinese no-name ones will state they are a 70A PSU explicitly. That said, whether they perform that high is another matter.
Thank you! I realised this by accident whilst triple checking my order this morning and ordered the LRS-450-5 ones from Light It Up. I'm glad to hear you say that - I was sure I'd seen them say 70A when looking previously (on AliExpress) and seeing 60A today confused me! I did grab one LRS-350-5 as a spare though.
Would allow for good distribution and shorter power runs = less voltage drop.
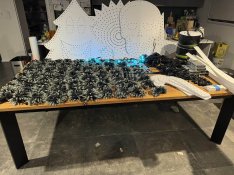
Yes, this is my rationale. I'd like to spread them around enough so power is never that far away, given I'm running 5V. That said, I think I'm going to be terminating a fair whack of 18AWG myself 😂

Also yeah, quite a few of my sections have a multiplier in the cell next to the name - I found that way and a few simple formulas the simplest way for me to visualise, but it's probably not obvious if you're not aware of it.
 

Whitey-

Apprentice elf
Joined
Sep 4, 2023
Messages
67
Location
Launceston, Tasmania
I was surprised today by a call telling me 2 boxes had arrived. "That's odd", I thought to myself, my Light It Up LEDs package coming today is 3 boxes. I got another call 10 minutes later telling me another 3 boxes had shown up. Turns out Light It Up LEDs and Extreme Lighting Displays must have been in cahoots to deliver a lot of cardboard the day after bin day 😂

IMG_1376.JPEG

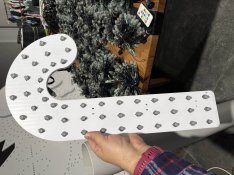
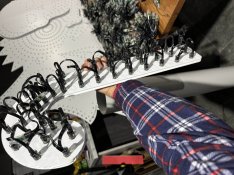
I thought I'd give it a crack pushing through a candy cane by hand, seeing as they're only 48px. Wow, my thumb is sore! Glad I did buy some pixel pushers.


IMG_1387.JPEGIMG_1388.JPEG

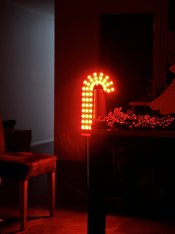
Worth it though!
IMG_1380.JPEG

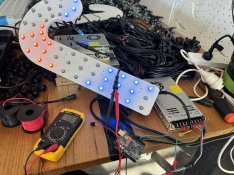
Tomorrow I'll do a full QA though everything I have and test properly and start ordering the dribs and drabs I'll need. I'll also buy some tubs so I don't get murdered for taking up the whole dining table (I'm taking the family out for breakfast in the morning so we don't have to move anything 😄).Weirdly the pixel tester I'm using says it supports 2048 pixels, but even with power injection I couldn't get it to light up more than 300.

Thanks everyone for your help so far, couldn't have gotten here without it!
 

Whitey-

Apprentice elf
Joined
Sep 4, 2023
Messages
67
Location
Launceston, Tasmania
So a quick update on how I went. I decided last weekend on Saturday arvo I'd run a simple Halloween show to test my skillset and find any gremlins early whilst I wait for various parts to arrive. Of course Halloween being Tuesday night, this was a challenge.

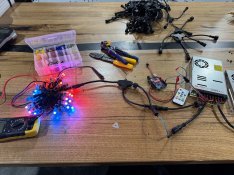
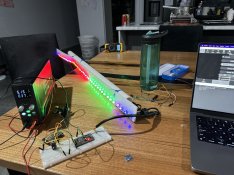
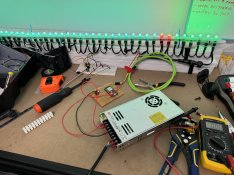
I started with some simple testing. I built a simple circuit using one of the Meanwell supplies I ordered and the Arduino I set up previously to do my LED strip testing. I went through and did QA on every single cable, light and power supply I had bought.

IMG_1406.jpgIMG_1410.jpg
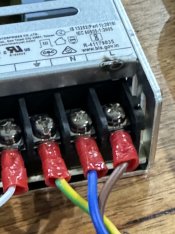
All was going well until I decided to move the 'live' wire out of the power supply. I of course unplugged it first. I saw the LED was still on, but I'd seen that it took a minute or so to power down previously (I'd guess whilst a capacitor is discharging), so given I was working on the mains side (unplugged, right?), this wasn't a concern.

IMG_1409.jpg

I learnt three things there.

1) The LTT screwdriver can take a punch of power (barely even marked the powder coating)
2) You should always check _which_ cable you unplugged - in this case the pixel tester
3) I should stop doing thing on my expensive dining table

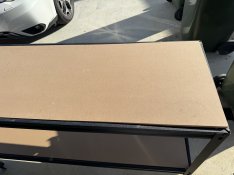
So I went the next day to the big green shed and bought myself a 'good quality' workbench, both for storage underneath and as a working area. As you can see, the quality was fantastic - the MDF didn't fit the fame. Nothing a shakey circular saw run can't fix!

1699293417556.jpeg

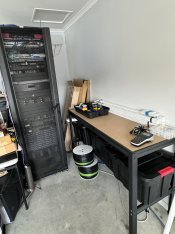
I set it up next to my other blinkey-light related hobby in the garage and went and sorted out dinner, bedtime etc for the kids.
1699293430989.jpeg

Apparently I can only attach 6 files per post, so we'll continue on shortly...
 

Whitey-

Apprentice elf
Joined
Sep 4, 2023
Messages
67
Location
Launceston, Tasmania
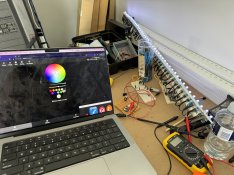
From this point, I decided we really needed to be running the actual intended software to continue. I had bought everything a bit fuzzy on the software, fairly confident I could work it out as I went, but now I really wanted the ability to control and test as I went.

1699293474925.jpeg

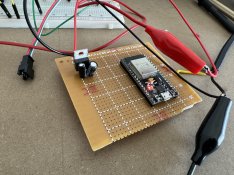
I built a simple circuit out of an ESP32, a LM3940 LDO to drop down to 3.3v, and a breadboard. It works pretty well, and I had full control via my laptop or phone to light 'em up! Happy evening!

On Monday, it was time to solder this thing out - I didn't really want to be running a show off a breadboard. An hour of frustrating mistakes later (I'm awful at soldering), I had something functional

1699293526893.jpeg1699293538214.jpeg

I started actually building some props at this stage, but realised I'd likely want multiple data signals pretty quickly, and potentially for some longer runs. I played with a few concepts (had some 4 core alarm cable around), but ended up settling on ethernet, as I have kilometres of it at home and it's rated for 48V power normally for POE. Again a quick test solder and all worked fine

1699293563624.jpeg
 

Whitey-

Apprentice elf
Joined
Sep 4, 2023
Messages
67
Location
Launceston, Tasmania
I spent quite a few hours Monday and Tuesday soldering props - mostly plastic items from Woolworths and the Reject Shop that had gone on clearance. Stripped out whatever lighting they had (if any) and replaced it. I also was sequencing as I went (trial by fire, but I wanted to do a song my kids like - Hide and Seek).

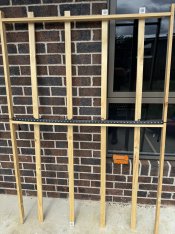
We'd also spent a lot of Monday pushing pixels through chromatrim, intended to mount it up on a wooden frame. I figured since I had the lights and the coro to do it, I'd go 48 x 30 - or 1200w x 750h @ 25mm (16:10 - 1440px). I know, ambitious - but it was all going fairly well, until we realised that standard spacing from piece to piece of chromatrim vertically is 50mm. Uh-oh.

I looked at going 48x15 (for the same spacing requirements), but this didn't feel right size wise. So we decided to snip up some of the 1000ft of Boscoyo MegaTree mounting strip we have, as it's skinny enough to place at 25mm vertically and horizontally. This proved difficult. The strip is much harder to push through than the coro, and the mounting becomes more challenging. We tested with a single strip with cable ties and deemed it 'good enough' and started pushing.

1699293820383.jpeg

Unfortunately at this stage (Tuesday arvo), kids needed to be picked up, dress up, etc. We push through 6 or so strips (+ the 8 or so chromatrim ones we'd already done) before simply running out of time.
 

Whitey-

Apprentice elf
Joined
Sep 4, 2023
Messages
67
Location
Launceston, Tasmania
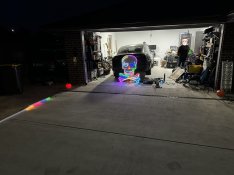
At this stage I decided to pivot to using the chromatrim strips as driveway liners. My current config was wall mounted skulls, pumpkins, scorpian/spider (one each side) and ghost - all mirrored each side of the driveway - plus the boscoyo skull and crossbones in the middle as a singing face. Adding 400 extra lights to this mix became my downfall.

As darkness fell, I got dad to help mount the skulls (Geralds) for me. The soldering and hot glue in them is pretty dicey, and unfortunately they're the primary link up the stage left side of the driveway.

1699293898707.jpeg
(Note this is an earlier revision, the later ones used Ray Wu connectors. This one went up with a JST -> Ray Wu adapter I made and held fine 😂)

The left side was on one output. On a second output was the stage right side of the drive, and the skull and crossbones singing face on a third. These all worked very well on the pixel tester... but not on my circuit. I don't have a photo, but after about 80-100 pixels it would drop, and the lighting leading up to it was faded for sure.

I took my trusty multimeter, and was still getting 4.2v at the drop point. What gives? The pixel tester was also lighting along fine there and beyond at the same measurement.

It took me a minute to realise. My 3.3v logic was fine on a short run (which is how I'd been testing). Dropping down to (I assume) around 2.8-3v wasn't a problem.. until I added 200px extra per run. At that point, my 'high' I guess was a 'low' on a 5v circuit - below the threshold. Doh!

I had bought 3.3v/5v (HV/LV) logic converters very early on in the blinky light process, not fully understanding what they were. When I build the circuit above, I saw that my lights worked off my 3.3v logic and completely moved on to other focuses, as I was time crunched for all my props and pixel pushing (try saying that 5 times fast!).

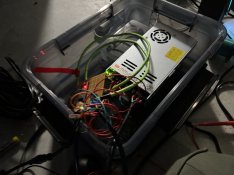
I began to solder a hacky connection up, but I ended up not connecting the ground somewhere (I assume, given the flickering when I next turned it on), and by that point it was 9pm and I had to call it. The cable box was a mess (I'd added a new output for the skull and crossbones during this time too, and I used about 3 different joining methods across everything connected).

1699294080469.jpeg


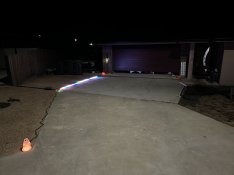
I left my one side of the driveway on the pixel tester to at least give some light to the driveway for the evening.

IMG_1525.jpgIMG_1526.jpg
 

Whitey-

Apprentice elf
Joined
Sep 4, 2023
Messages
67
Location
Launceston, Tasmania
Since then, I've reflected and understood my errors. My biggest learnings were:

Prop work takes time to do right

I was technically able to get a lot of props pushed out quickly (20-60 minutes per prop from start to finish), but they were relatively fragile. Multiple times I can across the issue of using the incorrect male/female cable, not considering the ingress/egress point for daisy chaining the prop, etc. Being under the pump leads to 'good enough' soldering and iffy hot glue when you don't have time to set things correctly or let them cool.

Spend the time to do the power and data cabling correctly

When I was desperately trying to save my show at 9pm, the cable management of my power really caused me grief.

Because I'd added on as I considered things, I wasn't able to cable manage correctly. Because I'd been testing different methods of joining, there were a lot of unexpected tight and loose points. I'm now planning to build out proper power boxes with mounted boards inside the box. I also am considering continuing using ethernet (for data, but potentially for L/N with two strands bonded) for cleanliness of cabling, maybe mounting some RJ45 jacks on each of my controller boards so I can plug in as normal. The other end will likely connect to an interim board whose purpose is to break out data and combine with power before outputting via Ray Wu pigtail. Maybe these will be a next year v2 version.

I'd also like to work out some form of cable management arm (a'la Dell folding arms at the back of rackmount servers) to handle slack. My experience doing live broadcast events (of which I've done quite a few) is not matter how well planned things are, you'll often need to do something during or just before the show to keep things running. Having clean and easy access to my solder points, controller and power is essential

WiFi controllers are fine
Watch this space and see if I flip on this opinion 😂

I did end up having 3 outputs on my ESP32 controller, and then played the show via FPP on a Raspberry Pi (with some $5 desktop speakers plugged into the 3.5mm jack). Neither of these had external antennas and everything was WiFi driven, and I had perfect signal with no packet loss, and this was on a shared network. When I run my Christmas show, I plan to deploy an enterprise grade 2.4GHz AP outside mounted on the wall with a dedicated network and likely no backhaul to my internet (or at least VLANed off). These will be locked to specific narrow width channels with low/no other devices on those channels.

I know there's a big aversion to WiFi, but I wonder if that's a combination of people using consumer grade gear and not understanding WiFi well beyond the setup wizard. I hope that doesn't come across patronising, but I have run WiFi at events with 10-20,000 members of the public around and 50+ other vendors all with their own noisy APs. If you use decent gear and you configure it correctly, it should be just as reliable as ethernet, outside of any hostile actors.

That said, I've also ordered 4x WT32-ETH01s (pre-connected ethernet ESP32s), so we'll see if I have to eat my words 😂
 

Whitey-

Apprentice elf
Joined
Sep 4, 2023
Messages
67
Location
Launceston, Tasmania
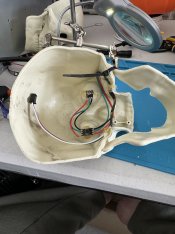
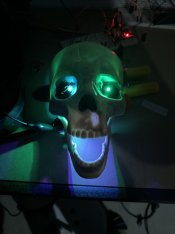
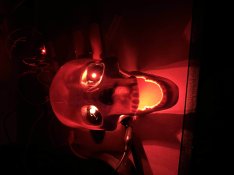
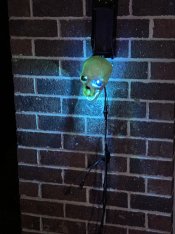
Here's the first prop I built, which the kids and I have named Gerald.

1699294474615.jpeg

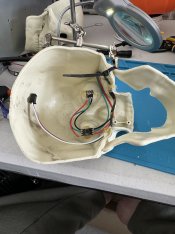
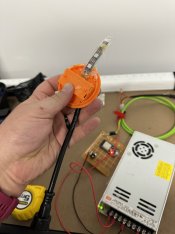
Gerald was $8 from the Reject Shop and came with some detached arms and plastic stakes attached, I guess to show him emerging from the garden. I'd love to put servos on the arms in the future and work with them, but for now I just drilled out Geralds eyes and plonked 3x WS2811b strip LEDs above the mouth as an underglow, and one per eye. I ended up going back and buying out the rest of their stock (6 extra Geralds), one for this year and the other 5 hopefully for next year.

IMG_1509.jpg

The pathing I picked does suck a bit and creates strain. I'm curious how someone more experienced would approach this.

IMG_1463.jpgIMG_1465.jpgIMG_1470.jpgIMG_1536.jpg
 

Whitey-

Apprentice elf
Joined
Sep 4, 2023
Messages
67
Location
Launceston, Tasmania
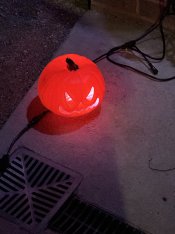
I found the Pumpkin also at the Reject Shop, I think for around the same price.

I bought two and ripped out the internal circuitry (1.2v and a single LED). I put a strip of 3x WS2811b inside to the back. The little circular battery holder was only hot glued in from the factory, so prying that out and drilling some holes for ingress/egress cables was pretty easy.

IMG_1490.jpg

It's okay, but I'd prefer to add something over them to diffuse it better. When you see the LED on the direct angle it looks pretty bad, but given their placement that wasn't really possible from the street.

IMG_1491.jpgIMG_1492.jpgIMG_1493.jpgIMG_1533.jpg
 
Top