- Thread starter
- #46
Conduits and flakes
After getting a promotion at work, it has been hard to get some blinky blink time after so many long workdays in the last few weeks. Thankfully drilling conduits and pushing pixels doesn’t require the grey matter to be in tip top shape.
Flakes
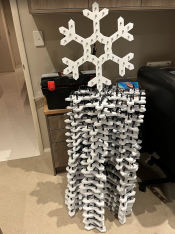
The main thing my wife wanted in our display was snowflakes, and she wanted lots! So from my initial design of around 8 snowflakes, we somehow ended up with 20! Having custom length pixels with 2m long pigtails on start/finish is going to make connecting them up a breeze and will require no additional extension cables. Honestly can’t go on enough about how good custom length stings are. I mistakenly ordered only 16 strings so needed to make up 4 stings the old fashion way.
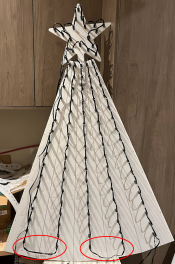
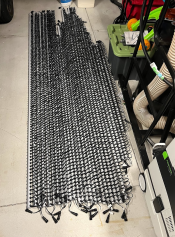
So here is my flake tower!
20@48 pixels
I have also purchased 15 lengths of 20mm pressure PVC pipe and metric tonne of elbows and tee’s to put together some roof mounting for the flakes. Stay tuned for that journey in the next few months
Conduits
For those following along, I have continually put off drilling all the conduits for the house and roof outline. I did drill a few hundred holes a few months ago and then put it in the too hard basket. Well, I wanted my garage floor back, so it was time to get to work.
While I saw some quite impressive 3D printed jigs, I don’t have a 3D printer and felt the jigs seemed overly complicated, so I decided to just mark up the conduits and drill with a very basic jig that kept the conduits centred. For marking, I laid a bunch of conduits on the ground all together (I was typically marking up 8-10 at a time) I used some scrap bits of wood to hold it all together while marking then used a pencil to mark between the two conduits to have a straight line on two bits of conduit. From there I laid out some pixel strip next to the conduit to get the accurate 1inch spacing (tape measure would have also done the trick) and used a set square to mark pixel locations across all 10 conduits at once for one pencil mark. Then moved up the each pixel hole……100+ times
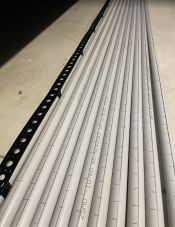
Then the drilling….and drilling….and drilling.
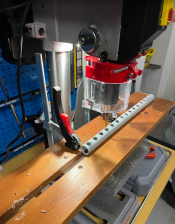
I was using 25mm electrical conduit (grey stuff) purchased at bunnings for the task as the conduit walls are relatively thin compared to reticulation pressure pvc pipe. Fun fact, the 25mm electrical saddle clips work on 20mm pressure conduit. I will be taking advantage of this for my prop mounting as pressure pipe has waaaay more connector fittings available compared to electrical fittings.
Early trials drilling with a forstner bit didn’t go well, it took big chunks out of the conduit even though I was going very slow and using a brand-new bit. Some people have had good results, but it didn’t work for me at all, not sure why. Take two was a $18 set of generic stepped drill bits I found on amazon. Worked amazingly well and could drill quickly with no ill effects. Boy does the drill bit get hot after drilling a couple hundred holes at a time!
First, I had to drill one side with the 12mm bit all the way through so that it drilled through the other side a little. Then once one side was done, I drilled from the other side out to approximately 18mm. I was using a 20mm forstner bit, so just needed to set the drill press stop at 18mm, I could have drilled to 20mm, but on the few times I tired, the length of the 20mm bit was widening the 12mm hole I already drilled on the other side! The second side drilling was very quick as I didn’t have to line anything up, having the pre-drilled pilot hole made it self-centre and I only needed to be vaguely in inline before drilling down.
Each length of conduit was cut to be 100pixels long possible to prevent any unneeded splicing, and also making them interchangeable was handy
Pushing the pixels was easier than into 10mm xFlute coro. Pixel pliers are really needed, and I found the best method was to twist it in place rather than rock it in place.
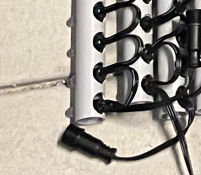
So here we have it, 2420 pixels for a total of 4840 holes drilled in all its glory.
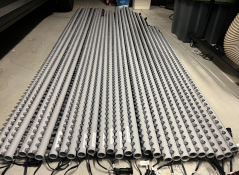
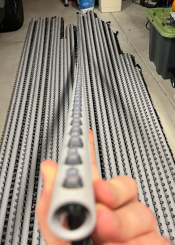
Was it worth it? no idea, time will tell
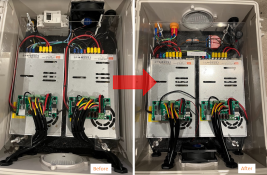
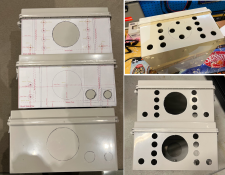
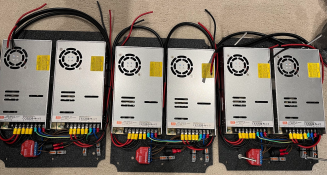
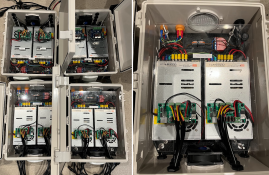
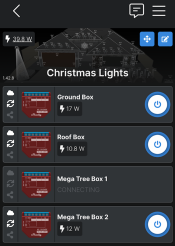
Next weeks task it to build 3 controllers boxes and upgrade the existing 2 boxes with smart switches. So much still to do!
After getting a promotion at work, it has been hard to get some blinky blink time after so many long workdays in the last few weeks. Thankfully drilling conduits and pushing pixels doesn’t require the grey matter to be in tip top shape.
Flakes
The main thing my wife wanted in our display was snowflakes, and she wanted lots! So from my initial design of around 8 snowflakes, we somehow ended up with 20! Having custom length pixels with 2m long pigtails on start/finish is going to make connecting them up a breeze and will require no additional extension cables. Honestly can’t go on enough about how good custom length stings are. I mistakenly ordered only 16 strings so needed to make up 4 stings the old fashion way.
So here is my flake tower!
20@48 pixels

I have also purchased 15 lengths of 20mm pressure PVC pipe and metric tonne of elbows and tee’s to put together some roof mounting for the flakes. Stay tuned for that journey in the next few months
Conduits
For those following along, I have continually put off drilling all the conduits for the house and roof outline. I did drill a few hundred holes a few months ago and then put it in the too hard basket. Well, I wanted my garage floor back, so it was time to get to work.
While I saw some quite impressive 3D printed jigs, I don’t have a 3D printer and felt the jigs seemed overly complicated, so I decided to just mark up the conduits and drill with a very basic jig that kept the conduits centred. For marking, I laid a bunch of conduits on the ground all together (I was typically marking up 8-10 at a time) I used some scrap bits of wood to hold it all together while marking then used a pencil to mark between the two conduits to have a straight line on two bits of conduit. From there I laid out some pixel strip next to the conduit to get the accurate 1inch spacing (tape measure would have also done the trick) and used a set square to mark pixel locations across all 10 conduits at once for one pencil mark. Then moved up the each pixel hole……100+ times

Then the drilling….and drilling….and drilling.

I was using 25mm electrical conduit (grey stuff) purchased at bunnings for the task as the conduit walls are relatively thin compared to reticulation pressure pvc pipe. Fun fact, the 25mm electrical saddle clips work on 20mm pressure conduit. I will be taking advantage of this for my prop mounting as pressure pipe has waaaay more connector fittings available compared to electrical fittings.
Early trials drilling with a forstner bit didn’t go well, it took big chunks out of the conduit even though I was going very slow and using a brand-new bit. Some people have had good results, but it didn’t work for me at all, not sure why. Take two was a $18 set of generic stepped drill bits I found on amazon. Worked amazingly well and could drill quickly with no ill effects. Boy does the drill bit get hot after drilling a couple hundred holes at a time!
First, I had to drill one side with the 12mm bit all the way through so that it drilled through the other side a little. Then once one side was done, I drilled from the other side out to approximately 18mm. I was using a 20mm forstner bit, so just needed to set the drill press stop at 18mm, I could have drilled to 20mm, but on the few times I tired, the length of the 20mm bit was widening the 12mm hole I already drilled on the other side! The second side drilling was very quick as I didn’t have to line anything up, having the pre-drilled pilot hole made it self-centre and I only needed to be vaguely in inline before drilling down.
Each length of conduit was cut to be 100pixels long possible to prevent any unneeded splicing, and also making them interchangeable was handy
Pushing the pixels was easier than into 10mm xFlute coro. Pixel pliers are really needed, and I found the best method was to twist it in place rather than rock it in place.
So here we have it, 2420 pixels for a total of 4840 holes drilled in all its glory.


Was it worth it? no idea, time will tell
Next weeks task it to build 3 controllers boxes and upgrade the existing 2 boxes with smart switches. So much still to do!


