- Thread starter
- #76
Still talking about 2023 setup in 2024? YES!
I hope you're all having a great start to the year. While I’ve already packed away my display, I'm still reminiscing about the setup process. I’m a little behind with the thread, but let's take a break from 2024 layout discussions and pre-buys to chat about some holiday shenanigans!
Halloween
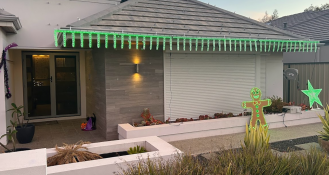
Who talks about their Halloween display in January! It really wasn’t much of a display, the kids were extra excited to go trick or treating and thought it might be fun to put up some icicles and a few props running test sequences. After talking about how crazy my Christmas lights would be, I think they may have been slightly disappointed haha! Little did they know!
See I told you I am behind! Who talks about their Halloween display in January? Well, mine wasn’t much of a display – an icicle, a few props, and some test sequences thrown around the found yard…... Kids were thrilled for the trick-or-treating way more than the lights unfortunately hahaha. After hyping up my Christmas lights plans to my neighbours, I think I may have set their expectations a bit too high and were slightly underwhelmed for Halloween!
Little did they know...
Props on the Roof
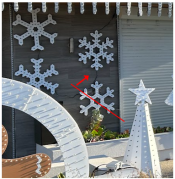
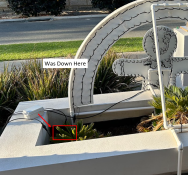
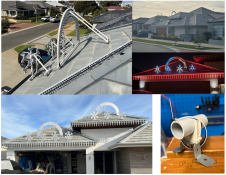
In an early post, I showed off my porcupine house with all the conduit clips siliconed to my house, well now it was time to get up on the roof and get everything in place. The process when much better than I thought, I didn’t have a single clip come loose when putting the props in place, and felt rock solid! Even the large arches felt quite secure. I did make sure that I cable-tied every prop to the conduit clip just in case it came off for some reason, the last thing I wanted was to see coro props flying around.
I approached the setup in what I thought was the most logical way possible. Roof outlines first, snowflakes, arches, and finally the icicles. I also tried to get as much of the cabling down at each prop so I didn’t need to go back onto the roof too many times. This did result in quite a few either long or short cables being used incorrectly but overall it went quite well. Getting the 3core extensions and Power Injection/Balancing wires in a somewhat tidy layout was a bit of a challenge. In some sections, I must have cable tied, cut, and re-cable tied 10 times to get it neat! With the 2m cable extension, I ordered for the 48pixel flakes, I had quite a bit of slack that needed to be tidied up between the flakes and didn’t need to use a single extension cable! Of course, I couldn’t resist getting some sequences playing with only a little of the roof setup! And could you blame me! So so cool to see it doing its thing.
Cable 3D printed labels
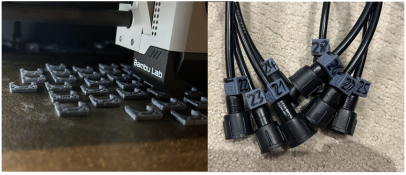
Before getting all the cables connected up I purchased the 3D print files for some cable labels from SFL-designs.com. These worked great and clipped very secularly onto the cables at the xConnect end. As they connect to the xConnect itself they work with both 2/3core cables, some of the other files I found only needed to be resized as they connect to the cable rather than the end connector. I never figured out how to print in two colours so just coloured in the numbers with a permanent marker, this worked really well and still showed perfectly at the end of the season. It was also really important to label everything as the two roof boxes required a fistful of cables to go through the roof eave hole thing and out onto the roof. Saved me a lot of headaches from figuring out the correct channel.
On the subject of knowing what went where, having a printed copy of the layout/port assignment I shared on one of my posts in my pocket saved a lot of trips up and down the ladder.
Mega Tree Setup
After getting everything set up on the house the mega tree was the last piece of the puzzle to get operational before I finally turn everything on together. It was really unfortunate timing as I needed a second set of hands (my dad) to help me stand up the pole with the steel topper and star topper in place. Boy was that thing heavy. I also took advantage of my dad’s rigging skills as he cut and made up the guy wires/shackles while I was busy prepping other things.
As my dad only had one day free, it needed to be done rain, hail, or shine, and boy did it rain! Wasn’t really a pleasant experience being out in the rain trying to get a mega tree up for the first time. Blind leading the blind! Next year I would change how I set it up as I discovered I could reach the steel topper plate from the ladder and remove it before pulling the poles out. Much safer and easier on the body. Lesson learnt!
Once the pole was up, I drilled in the ground anchors and nearly broke my wrist! Boy does my drill put out some torque, it nearly ripped my hand off. After that little incident, I attached the two-handed drill attachment that I should have used to begin with and I was off to the races. Easy As.
I carefully laid out all 32 strips and connected them together on the ground in groups of 4 totaling 600 pixels per port. As I allowed 3-pixel strip holes at the bottom and only 1 hole at the top I needed 16 of each, but seem to have miscounted and down 17/15. Out came the pixel pliers to swap over to 150 pixels to the correct hole. Connecting to the steel topper was easy, and soon all 32 strips were up and I could winch up the mega tree to its full height!
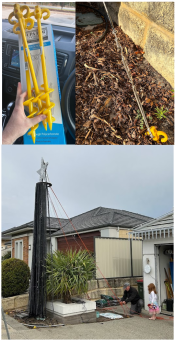
I thought about all kinds of fancy ways I could connect the bent steel arch to the ground stakes but in the end, you just can’t beat zip ties! Fantastic invention. As the strips held it up and the stake held it down, it kinda just floated there doing its thing. Plus, after a few days in the sun, the strips loosened a little and I could just tighten up the zip ties in about 30 seconds flat. To connect the pixel strips to the pole I used bungy balls spaced at 90mm increments to get even spacing. I did have to adjust these most nights as they seemed to move in the wind, so next year I’ll use something (probably more zip ties!) to keep them in place a bit better.
Once I had the tension just right I could drill all the way through the inner pole to enable the safety bolts to be put in place. Once they were in place I took all the tension off the winch and pole and felt much better knowing it would be hard for kids to tamper with it and get themselves in trouble.
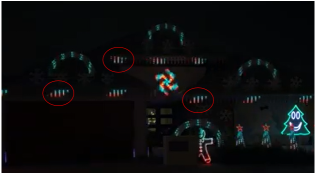
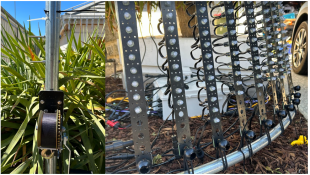
Does anyone notice anything wrong………Whoops! That would explain why I needed to re-push 150 pixels to the correct hole. Sigh, time to re-do it for a second time.
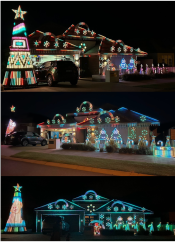
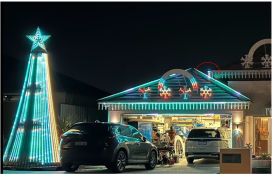
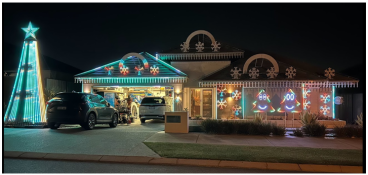
By this time all the house props were up, but i hadn't completed the PI wiring for 2/3 of the roof. Still a sequence needed to be played. I also managed to have 8 mega tree strips in the wrong order so i never connected them up initially. Still super happy with how it looks!
I hope you're all having a great start to the year. While I’ve already packed away my display, I'm still reminiscing about the setup process. I’m a little behind with the thread, but let's take a break from 2024 layout discussions and pre-buys to chat about some holiday shenanigans!
Halloween
Who talks about their Halloween display in January! It really wasn’t much of a display, the kids were extra excited to go trick or treating and thought it might be fun to put up some icicles and a few props running test sequences. After talking about how crazy my Christmas lights would be, I think they may have been slightly disappointed haha! Little did they know!
See I told you I am behind! Who talks about their Halloween display in January? Well, mine wasn’t much of a display – an icicle, a few props, and some test sequences thrown around the found yard…... Kids were thrilled for the trick-or-treating way more than the lights unfortunately hahaha. After hyping up my Christmas lights plans to my neighbours, I think I may have set their expectations a bit too high and were slightly underwhelmed for Halloween!
Little did they know...

Props on the Roof
In an early post, I showed off my porcupine house with all the conduit clips siliconed to my house, well now it was time to get up on the roof and get everything in place. The process when much better than I thought, I didn’t have a single clip come loose when putting the props in place, and felt rock solid! Even the large arches felt quite secure. I did make sure that I cable-tied every prop to the conduit clip just in case it came off for some reason, the last thing I wanted was to see coro props flying around.
I approached the setup in what I thought was the most logical way possible. Roof outlines first, snowflakes, arches, and finally the icicles. I also tried to get as much of the cabling down at each prop so I didn’t need to go back onto the roof too many times. This did result in quite a few either long or short cables being used incorrectly but overall it went quite well. Getting the 3core extensions and Power Injection/Balancing wires in a somewhat tidy layout was a bit of a challenge. In some sections, I must have cable tied, cut, and re-cable tied 10 times to get it neat! With the 2m cable extension, I ordered for the 48pixel flakes, I had quite a bit of slack that needed to be tidied up between the flakes and didn’t need to use a single extension cable! Of course, I couldn’t resist getting some sequences playing with only a little of the roof setup! And could you blame me! So so cool to see it doing its thing.

Cable 3D printed labels
Before getting all the cables connected up I purchased the 3D print files for some cable labels from SFL-designs.com. These worked great and clipped very secularly onto the cables at the xConnect end. As they connect to the xConnect itself they work with both 2/3core cables, some of the other files I found only needed to be resized as they connect to the cable rather than the end connector. I never figured out how to print in two colours so just coloured in the numbers with a permanent marker, this worked really well and still showed perfectly at the end of the season. It was also really important to label everything as the two roof boxes required a fistful of cables to go through the roof eave hole thing and out onto the roof. Saved me a lot of headaches from figuring out the correct channel.
On the subject of knowing what went where, having a printed copy of the layout/port assignment I shared on one of my posts in my pocket saved a lot of trips up and down the ladder.

Mega Tree Setup
After getting everything set up on the house the mega tree was the last piece of the puzzle to get operational before I finally turn everything on together. It was really unfortunate timing as I needed a second set of hands (my dad) to help me stand up the pole with the steel topper and star topper in place. Boy was that thing heavy. I also took advantage of my dad’s rigging skills as he cut and made up the guy wires/shackles while I was busy prepping other things.
As my dad only had one day free, it needed to be done rain, hail, or shine, and boy did it rain! Wasn’t really a pleasant experience being out in the rain trying to get a mega tree up for the first time. Blind leading the blind! Next year I would change how I set it up as I discovered I could reach the steel topper plate from the ladder and remove it before pulling the poles out. Much safer and easier on the body. Lesson learnt!
Once the pole was up, I drilled in the ground anchors and nearly broke my wrist! Boy does my drill put out some torque, it nearly ripped my hand off. After that little incident, I attached the two-handed drill attachment that I should have used to begin with and I was off to the races. Easy As.
I carefully laid out all 32 strips and connected them together on the ground in groups of 4 totaling 600 pixels per port. As I allowed 3-pixel strip holes at the bottom and only 1 hole at the top I needed 16 of each, but seem to have miscounted and down 17/15. Out came the pixel pliers to swap over to 150 pixels to the correct hole. Connecting to the steel topper was easy, and soon all 32 strips were up and I could winch up the mega tree to its full height!

I thought about all kinds of fancy ways I could connect the bent steel arch to the ground stakes but in the end, you just can’t beat zip ties! Fantastic invention. As the strips held it up and the stake held it down, it kinda just floated there doing its thing. Plus, after a few days in the sun, the strips loosened a little and I could just tighten up the zip ties in about 30 seconds flat. To connect the pixel strips to the pole I used bungy balls spaced at 90mm increments to get even spacing. I did have to adjust these most nights as they seemed to move in the wind, so next year I’ll use something (probably more zip ties!) to keep them in place a bit better.
Once I had the tension just right I could drill all the way through the inner pole to enable the safety bolts to be put in place. Once they were in place I took all the tension off the winch and pole and felt much better knowing it would be hard for kids to tamper with it and get themselves in trouble.
Does anyone notice anything wrong………Whoops! That would explain why I needed to re-push 150 pixels to the correct hole. Sigh, time to re-do it for a second time.

By this time all the house props were up, but i hadn't completed the PI wiring for 2/3 of the roof. Still a sequence needed to be played. I also managed to have 8 mega tree strips in the wrong order so i never connected them up initially. Still super happy with how it looks!


