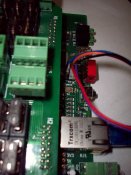
Here is a cheat sheet of how I upgraded my OLD PIXAD8 to the new bootloader and then installed the new app firmware
J1Sys has a video on the UBL23 pc app have a look at it before you start to instructions below
it will help you understand what is happening in the bootloader.
http://www.j1sys.com/legacy/UBL_Quick.swf
I have MPLAB IDE V8.76 allready loaded on my pc below is a link to version 8.76 if you need to download and install
http://ww1.microchip.com/downloads/en/DeviceDoc/MPLAB_IDE_8_76.zip
download New Bootloader file
http://www.joshua1systems.com/assets/UBL_1.2/UBL_ECG_M32MX_1.2a.hex
and the app Firmware file
http://www.joshua1systems.com/assets/APP_2.7/ECG_PIXAD8.X.v2.7.hex
And the new PC app Uploader file
http://www.joshua1systems.com/assets/PIC32UBL/PIC32UBL.zip
Open MPLAB
connect your PICKIT 3 to your PC
With power off on your PIXAD8 connect Pickit3 to ICSP connector on PIXAD8 Making sure that pin 1 (white Triangle) goes to pin 1 on board (White triangle with P1) You can also connect your Ethernet cable to the PIXAD8
Power up the PIXAD8
MPLAB Menu -> File -> Import ... Open the UBL_ECG_M32MX_1.2a.hex Previously downloaded
MPLAB Menu -> Configure -> Select Device...
Select PIC32MX795F512L from device drop-down
MPLAB Menu -> Programmer -> Select Programmer -> 6 PICkit3
You should get a message with
Target Detected
Device ID Revision = 04300053
You are now ready to erase your PIC32
MPLAB Menu -> Programmer -> Erase Flash Device
You should get a message with
Erasing...
Erase device complete
MPLAB Menu -> Programmer -> Program
You should get a message with
Programming...
Programming/Verify complete
you should see led2 flash slowly and led4 flashing fast
This is to show you that the bootloader is active on the PIXAD8
Connect your network cable if it is not already connected
Unzip the PIC32UBL.zip and open the PIC32UBL.exe
When it open you will see the window
Note YOUR ipAddress will have reset back to 10.10.10.10
Ensure that that you have Ethernet section Enabled
Click the "Connect" button if you have not removed the power from PIXAD8 it should respond immediately
You should get message sayimg that you are connected
You should now have an enabled "LOAD HEX File" Button Click this and load your ECG_PIXAD8.X.v2.7.hex file
You should see a message hex file loaded successful.
Click button "Erase-Program-Verify"
You should see a message
Flash Erased
Programming completed
Verification successful
Start: 9D009180 Len: 35D04 CRC: D8AA
Your PIXAD8 is fully programmed Turn off power PIXAD8
Remove PICkit3
Restart PIXAD8 and use your browser to configure
I found the following J1SYS video helpful here and it also explains some of the other features available in pc Application BootLoader
http://www.j1sys.com/legacy/UBL_Quick.swf This is the same video listed above.
I hope this is a help (sorry about the Length of instructions.
Regards Jeff Rae
Modified to fix formating


